Felicia Said…

Hey beautiful people!

How goes it? We are happy and kicking at The Kink and I.

So. You may wonder what the point of hair meet-ups is, especially if you’ve been natural for a while and you’re happy with your hair, your regimen, all that. Well, apart from connecting with other naturals, I believe every day is an opportunity to learn something new. May 30 will make it 3 years since my big chop (whoop whoop) and sure I’ve been immersing myself in hair knowledge during this time, but I do not know it all.

Stylist to the stars, Ms Felicia Leatherwood & Obia Ewah (of Obia Natural Hair) had the more “technical” workshops at the Nigerian Natural Hair & Beauty Show on Saturday. Technical is not the right word, but theirs were the presentations about hair care (what to do, and what not to). Obia’s workshop was about hair science- the importance of pH balance in products. More about that on Friday.

During Felicia’s workshop, I was texting MeeMee and even after that on Sunday- telling her what I had heard. Felicia said… Felicia said… LOL Hence the title of this post.

Alrightie then. Felicia said many things. Some new to me, some I already knew- all important. I took notessss (not everything) but here are some things you could think about:

1. Deep conditioning once a week is ideal. But, if you’re too busy, twice a month should be good. 25-35 minutes, with moderate heat.

2. Not rinsing shampoo out completely, and rinsing hair when you wash with water that’s too hot could cause dryness.

3. However, it is good to wash your hair in twists and rinse out your conditioner with hair still in twists. This means you retain some of the conditioner, and this helps your hair retain moisture while you style.

4. While you should rinse shampoo out with warm water to open your cuticles, rinse out your conditioner with cold water to seal your cuticles, reduce frizz and encourage shine.

5. Product junkies in the building? A faster way to test or compare products. You can try multiple products in one wash. Section your hair. You can deep condition half your hair with one product, and do the same on the other half with another DC. When you’re done, you can tell which section of your hair you like better, and as such, which product you prefer.

6. For more effective cleansing, especially if you have dandruff, “grease” your scalp with shampoo, before wetting your hair. By wetting your hair before applying shampoo, you can easily just lather lather lather and still not get most of the residue off.

7. Many people that think they have dandruff don’t really have the condition. Their scalps are just flaky for a bunch of reasons (this I can relate to. In my relaxed days I thought I had dandruff. Now, I don’t. I take better care of my hair now- oil my scalp, wash more often, all that.) So. If you have dandruff or your scalp is flaking a lot, it could also be because you have too much sugar/ starch/carbohydrates in your diet. Rice, yam, garri, soda, all these things break down to sugar. Reducing the amount of sugar you eat could turn your scalp around.

8. Colour treated shampoos & conditioners are best for coloured hair. They help maintain the colour, so it doesn’t fade fast. Felicia recommends Joico K-Pak & Ion Solutions. 

9. She prefers cutting natural hair dry because of shrinkage. And also because different parts of hair grow at different rates.

10. With kinky hair, it’s better to blow dry with a comb attachment than with a brush.

On Hair Trimming:

11. It’s best to go to a stylist but you can DIY with dusting. Dust your hair by two strand twisting (uniformly) and then cutting off what’s thinner at the ends. Then, do a blow out and if your ends still look a mess, please go to a stylist!

12. At your stylist’s, don’t be afraid to communicate. If your stylist makes you uncomfortable, feel free to leave! Trim the hair small small. You can start with one inch, and then when you see how that goes, do another. Till you’re done.

13. Hint hint: look at your thumb. The distance from knuckle to fingertip is one inch.

14. If you want to give yourself a proper trim (not dusting) good luck but please concentrate. Don’t be on the phone, don’t be talking to anybody or chasing any children.

15. Women of Colour have so many issues with our edges not necessarily because we are genetically indisposed. It’s because we start styling our hair so early! Yes guys- even the cute afro puffs and styles with hair baubles count. Can haters see why Blue Ivy will flourish? 😋

16. Now this is one thing I always always do- and it’s good to hear it from a stylist who knows. Hold your edges while they’re being braided. Put your phone down and put your hands at that base. With cornrows too, hold it down and push forward.

17. To rejuvenate lost edges, try using Castor oil every 2-3 days. ORS Temple Balm is good too. Use twice a day for 6-8 weeks.

18. When you wear twists or braids, do a retouch every 2-3 weeks. Here, retouch means- take out the twists or braids at your hairline and redo them.

19. Nature Tint is a vegetable dye she recommends. Safe enough for use every 4-6 weeks.

20. When you start having more than just a few grey hairs, dyeing your hair will make your hair rebel & the greying will intensify LOL. So, for just a few stray greys, it’s better to use mascara or hair chalk (as long as you stay dry!)

21. Some people’s hair grows faster when it’s warmer, in the summer. (I don’t know if this applies to us here where it’s almost always warm.)

22. It’s best to use products 8 months to 1 year after opening.

23. Transitioning? Start doing curly wet sets to blend both textures. As your hair grows, you can trim off your relaxed ends now and again.

24. Curl Wax by AmPro is one of her secrets! It makes hair resistant/ impervious to changes in the weather. You can be great even in humidity. This product can help preserve a curly style for 10-20 days. Yep, new product on my list!

25. Create updos in sections, start from the back.

26. When applying styling products to your hair, start with a dime size amount per section (tiny as it is) and massage it into your hair. You can add another, and another as needed. This way you can build up to the required amount without using too much.

27. Someone in the audience asked and she confirmed, yes Cayenne Pepper can stimulate growth. Don’t go and pour the pepper on your hair raw o. Oils infused with cayenne pepper can rejuvenate. I’ll go research how, and let you know what I find out soon enough.

Okay guys. What new tips did you learn lately? Were you already familiar with all 27 tips? If you were at the show, what points in particular did you go home with?

Till Friday!

Love,

AB,

xx

P.S. Pictures from #NNHB2015 over here. 

Heat… Heat… Heat Damage

Sigh.

Sigh.

I’m sorry, I just don’t know how to say this.

Okay. Remember that time I spontaneously straightened my hair? Well, yup. My beautiful coils got heat damaged.

How did I determine it was heat damage?

1. Smell.

By the morning after I straightened my hair, I could smell the burn. It smelled like someone had lit my hair on fire and it absolutely irritated me, the smell. When I finally decided to wet my hair in the shower, and the smell lingered on, I knew that I was screwed. Sigh.

2. Loss of coil elasticity.

The beauty of natural hair is how versatile it is. Shrinkage has to be the 8th wonder of the world. Usually, when straightened natural hair is wet, it ought to go back to its natural curl pattern. In addition, when the hair is pulled at by fingers, it ought to spring back and curl back in. Granted, my hair, after washing, was shrunken, however there were visible straight tips. Also, when I pulled at any part of the hair, it became straight and would refuse to spring back. Sigh.

photo (8)

3. Loose curl pattern.

For me, this was the third indication. I twisted my hair one night in preparation for a twist out and my hair felt too fine and thin. I am not thick-haired, but the thinness that I felt was definitely strange. That was when I studied my coils in the mirror and yup, most of my coils were really loose. Sigh.

What to do? What to do?

I decided that I was going to restart the Maximum Hydration Method. Basically, the changes that follow heat damage all point to one thing – moisture.

Different people have tried different things that have worked in helping to deal with heat damage. Here a few examples:

1. Apple Cider Vinegar Rinse.

Well, clarify. That’s the purpose of the rinse. Usually, when your hair is straight, more products go in and there is high build up by the time you are ready to revert to curly/coily hair. So cleansing and clarifying hair properly is highly necessary. However, in nurturing your hair back to life, it is advisable to do the ACV rinse every so often (say, weekly).

2. Protein Treatments.

One baggage that heat damage comes with is weak hair that tends to split a lot at the ends. I actually noticed that when my hair was straight and I combed through, there were broken strands of hair on the comb and the table as well. Ugh. A store-bought protein treatment (e.g Aphogee 2-minute reconstructor) or a DIY treatment will suffice. But be careful! Don’t overdo it with the protein now.

3. Deep Condition.

Ah yes. Deep condition! Deep condition!! Deep condition!!! Choose your favourite highly moisturising deep conditioner and use it regularly and freely.

4. Hot Oil Treatment.

The point of most of these is to retain as much moisture as you can. Your hair has been robbed of its natural oils and is basically dead. So you will need to overcompensate for a while until it gets back to being independent. Hot oil treatments help. I will also add that you try oil rinsing with your frequent washes.

6. Allow hair to be slightly damp more often.

You know how sometimes we like to do our favourite styles on dry hair? Yeah, you can’t anymore. At least not yet. Have a spritz bottle handy with a water/conditioner or water/oil mix handy to spritz your ends with. In the state of damage, they get dry really easily and this will help to train your hair to be more accepting of moisture.

7. Cut/Trim.

Shiver. They say this is the last resort. If all fails, you gon need to go to the scissors (or even the clipper! *screaaammm*). If your damage is horrendous, you will need a lot of patience. However, as  you treat your hair delicately, you will need to imitate a transitioner. What this means is that you will need to trim off the ends regularly until all of your hair is back to being the hair that you once knew. Sometimes, people take the plunge and do the big chop. I. Will. Not. Be. Doing. This. No no no. I mean I only have one year of growth but please, it is never that serious. I shall nurse this hair back to life.

How can you prevent heat damage?

1. Don’t do it too much!

Usually, heat damage affects naturals that abuse the straightening iron. However, as in my case, even doing it once without proper safeguards can destroy your hair. The number of passes the iron makes through your hair should not be multiple. Two passes, and move on please. I didn’t count mine, but I bet she made more than 5 passes. When you start to see and/or smell those fumes coming from your hair then you should be afraid and stop what you’re doing.

2. Heat protect

Always, always, always use a heat protectant serum with any form of heat, especially a flat iron. I have no idea what was used on my hair (which was a very stupid thing to do. Do not be like me.). I advice that if you will be going to the salon, take your product with you or at least trust what the salon has before proceeding. There are more and more straightening kits in the market now and while I am not sure about the post-straightening services that they offer, at least they have heat protectants that help prevent damage.

3. Healthy pre-straightening practices

This is just as important as using a heat protectant. Make sure your hair is clean and deep conditioned before the blow-drying portion of the straightening process.

Because of the weather and because I was overwhelmed by what was happening to my hair, I am now currently caring for my hair in Marley twists. I shall let you know how that goes when I take down to assess progress.

So, yes, I was stupid and I’m paying the price. Thankfully, heat damage is not irreversible. On a similar note, I came across the idea of heat training. Apparently, it is applying heat regularly to cause hair curl pattern to become looser. The idea is to have healthy hair but loose curls and texture. It has been argued that heat training is not heat damage as it does not come with the dryness and brittleness of heat damaged hair. What are your thoughts on this? Have you had heat damage? How did you rescue the situation

Remember, we’re having a Big Fat Giveaway because we love you guys! 11 days left to enter, so do it!

Be smart with your choices this week.

– Mee Mee

❤ 

Maximum Hydration Method: My Experience so Far

Hey beauts!

I had so many ideas for how to present this post to you. They excited me, these ideas. I was going to show you every day, with pictures, how my curls were evidently approaching maximum hydration. I was going to give you pictures to ooh and aah over of how day 1 hair was way different from day 5 hair.

But…

There was no difference. I’ll let you have a quick look before I go off on a rant.

WP_20140826_003

Day 1

WP_20140827_003

Day 3

WP_20140902_006

Day 7

There you go!

In case you missed it, there is a post on the Maximum hydration method (MHM) here.

How did I go about my MHM?

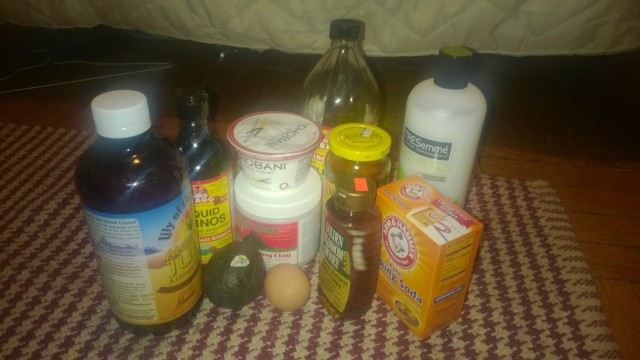
I began with the Cherry Lola Caramel treatment.

WP_20140825_002

The best way I can describe my hair after this treatment is that it felt stripped of everything. The smell of the aminos was very overpowering in the mix. At a certain point during the treatment, I began to smell ammonia coming from my hair. Ugh.

Mistake Numer Uno:

Apparently, on day 1, after the Cherry Lola Caramel (CLC) treatment, the ACV or Baking Soda rinse should NOT be done. Somehow, I skipped this part of the instructions and after my CLC treatment, I did an ACV rinse. In hair science, what I ended up doing was opening up my hair cuticles with the CLC treatment in readiness for moisture and then closing it straight back up with the ACV rinse. Bad bad bad.

After the ACV rinse, which I kept on for about 30 minutes, I co-washed with Tresemme naturals nourishing moisture conditioner. This was my first time of using this conditioner and I have to say that I quite like it. Product review in the future? I then DC’d overnight with this conditioner as well.

Now, I have a feeling that perhaps I was wrong for DC-ing with just a conditioner and not a product created specifically for use as a deep conditioner? What do you guys think?

The DC option I opted for was the overnight option. So basically, I began each day of my MHM treatment at night, close to bed time.

Come morning, I would rinse out the deep conditioning treatment and then do a bentonite clay rinse for 15minutes. From day 1 – 5, I did the clay rinse for 15 minutes. On days 6 and 7, desperate for results, I did clay rinse for up to an hour.

After rinsing out the clay, I sprayed my damp hair with a mixture of Tresemme naturals nourishing conditioner and water. I then finished with ecostyler gel.

As explained in the MHM post done previously by AB, there are certain approved products for use in the MHM treatment. I admit, before commencing on this journey, I did not do an extensive homework. I made a number of assumptions, one of which was that Ecostyler gel was definitely on the list of acceptable gels. Afterall, most people swear by Ecostyler. But alas, I was wrong.

Another assumption I made was that by day 7, my hair was definitely going to look like the ‘after’ pictures I had been seeing around hair blogosphere. Wrong! I won’t even lie, it kinda hurt. Mainly because I religiously went about this treatment, excited for results.

Will I say this was a total waste of my time and resources?

No no no. Infact, I have made a decision to stick to the MHM treatment. Why? I got results that were not physical.

– My hair felt softer each day, without any products in it.

– I experienced very minimal or no breakage. By day 2, I stopped seeing loose curls lying all over the bath tub after my hair wash.

– My hair also felt stronger.

– My dry twist outs were super-defined, without any products. This was the result that amazed me the most. Unfortunately, I have no pictures because I am yet to learn how to wear a twist out so I end up destroying it after careful unravelling.

For these reasons, I would definitely recommend the MHM treatment. AB asked me a few days ago how keen I was on ‘finding my curl definition’. I believe my reply was something like “2 out of 10”. I am happy with the way my hair looks at the moment. I was just fascinated by the results this method produced for other women. I shall continue the MHM treatment and if anything changes, I will definitely report back to you and let you know how I may have altered the regimen.

This is is from me for now.

I hope the new week was off to a brilliant start.

Be good to your hair!

– Mee Mee

xx.


How To: Caring for Braids.

WP_20140311_011

Hellur AB readers! Can I just say how honoured I am to be featured here? Shout out to my haters and to the village people that gave me this dandruff curse. I have one thing to say to you: look at me now! So, yes, I battle with dandruff. This is one of the reasons I decided to stop installing weaves. Now, when I need to hide my twa, I either use a wig or have braids or twists done. With these, I find I can still care for my scalp. For the longest time, though, it never occurred to me that I could wash my braids. In the past, after the first week of having my braids in, I become anti-social. Why? My hair would have started to stink and I wouldn’t want to subject anybody to that horror. Fast forward to 2013 and I randomly decided to try to salvage my old, smelly braids (babes were broke. Desperate times… desperate measures). In case you are still wondering why I am here, today, I will be sharing with you:

How I Wash My Braids

Disclaimer: Frequent washing of braids causes them to age quicker.

What Do I Use?

Nothing different from my normal wash day regimen. WP_20140326_003 How Do I Wash?

I have learnt that my hair gets dry quickly when I have braids in. I have also learnt that with braids, the dirt just seems to stick very easily. To maximise the effect of the wash without stripping my hair of the very minimal moisture, I make sure to prepoo the night before wash day. Typically, I use olive oil for this. Why? It is the cheapest oil I have in my stash. Ain’t nobody trying to use up precious, precious JBCO or any other oil that is exclusively for hair TLC, on a prepoo.

Side Note: I have prepoo’d once with PAX Bitters and not only did it help to rid my scalp of dandruff, my hair felt softer with the first wash.

When prepooing, I aim to saturate my scalp and roots as much as possible or as much as I can handle. Forget that ‘dime size’ story that they tell everywhere. Notice that I keep saying ‘scalp’. It is important to remember that in washing your braids, your main focus is on your scalp and roots; not on the body of the braids. Wrap hair as one would at night and sleep peacefully, while the oil seeps unto my forehead, ears and pillow case.

On the day, I wash at least twice with either black soap or L’Oreal EverCreme Sulphate Free Shampoo. Rinse. I then wash once with Herbal Essence Hello Hydration Moisturising Conditioner. After this, I rinse with a mixture of one part Apple Cider Vinegar and one part water. Next, I line my scalp and roots generously with Herbal Essence Hello Hydration Moisturising Conditioner and massage evenly. I then pack up the braids and hide them inside a shower cap. Depending on how much time I have, I can either sit around for half an hour or go into the shower and bathe the rest of my body, while the conditioner works its magic. Rinse scalp and body of braids thoroughly and wrap wet braids in a towel like a beautiful damsel. Fin! WP_20140321_012 Are you disappointed? Were you expecting something more technical? It’s quite stress free and gives me such good results that I indulge every week. Scalp and hair are clean sans product build up and hair smells fresh. Like I noted above, one down side to this is that your braids, especially at the roots, start to look old.

Please leave your questions in the comment section and I hope this has touched someone’s life today.

Stay clean and fresh until I have something else to share with you.

Love and Light (or what does AB sign out with?)

Best Fran (Meemee).  

Making The Most of Your ‘Poo!

When I started my hair journey, I hated shampoo because it made my hair feel like a scouring sponge. I discovered alternative no-poo methods which were great and have written about before.

Now, 1 year and 7 months later, I can say that Shampoo in the bottle as you know it, is not the enemy. I love to Poo after my hair has been in a protective style for weeks and just to be on the safe side, when my hair is out, every four weeks or so to keep Product Build-up away.

Yes, most shampoos are harsh on hair because they contain detergents/surfactants called Sodium Lauryl Sulfate (SLS) and/or Sodium Laureth Sulfate (SLES). These chemicals cleanse deep, and for this reason, your hair may be left very brittle and dry.

Sulfate-free shampoos contain milder surfactants like cocamidopropyl betaine in place of SLS/SLES. I’d especially recommend them to people who need to wash their hair often, like swimmers.

You don’t need to shampoo every three days or every other week, but no matter your preference, these pointers will help you make the most of ‘Poo days- with or without sulfates. 🙂

How cute

Source: Pinterest

Dilute It!

You can reduce the harsh effects of your shampoo by diluting it with water. Get an applicator bottle or even a regular bowl. Put in a little amount of shampoo and add water (not too much!) and shake the bottle or shake up with your hands (if you’re using a bowl)- and you’re ready to wash!

Gently focus on your scalp

Have you ever heard- Shampoo is for scalp and Conditioner is for hair?

When you’re shampooing, the focus should be on your scalp. If you focus your application on the scalp, it will be well cleansed and the shampoo will still get to your hair strands. You don’t need to scrub your hair as it lathers and you definitely don’t need to scratch your scalp in the process.

Pre-Poo

This is simply the act of applying oils or conditioners to your hair before shampooing to prepare it for the harsh manipulation to follow. I vouch for plain oil pre-poos.

Science says coconut oil is the best for pre-pooing because of its ability to be absorbed into the hair shaft. 8 hours is also said to be the optimum time for your coconut pre-poo. I use coconut oil when I have it, and when I don’t- olive oil. And except I’m pre-pooing overnight, 3-4 hours is just good for me.

Add Oil

If you haven’t got the time to pre-poo, just add oil to the amount of shampoo you’re ready to use. You don’t have to dilute it with water. My favourite oils for this are Castor and Olive.

Make sure you Deep Condition!!

This is a MUST! The cleansing process strips your hair of its moisture and natural oils. Some people prefer to Deep Condition their hair before shampooing, to add a little more moisture so that the hair feels less stripped afterwards. Others prefer to DC on clean hair after a wash, to replenish lost moisture. Either way, both methods work. So choose what you like, and make sure you do!

So guys. How do you make shampooing worthwhile? What works for you and what doesn’t? Feel free to have your say in the comments!

You know you could always email: thekinkandi@gmail.com

Till next post,

Love,

AB

xx

P.S. The focus of this article is really on the regular SLS/SLES Shampoos. If you find that your sulfate-free shampoo or even conditioner strips your hair, you could follow the pointers too. But if they work fine, doing their jobs without stripping your hair down, you’re fine using them alone.