Hey guys!
What have you been up to?
One of the things I did during my two week blog absence was Henna.
I went home for Easter, and I didn’t travel with my hair products. When I took my kinky twists out, I had nothing but my spray bottle and coconut oil.
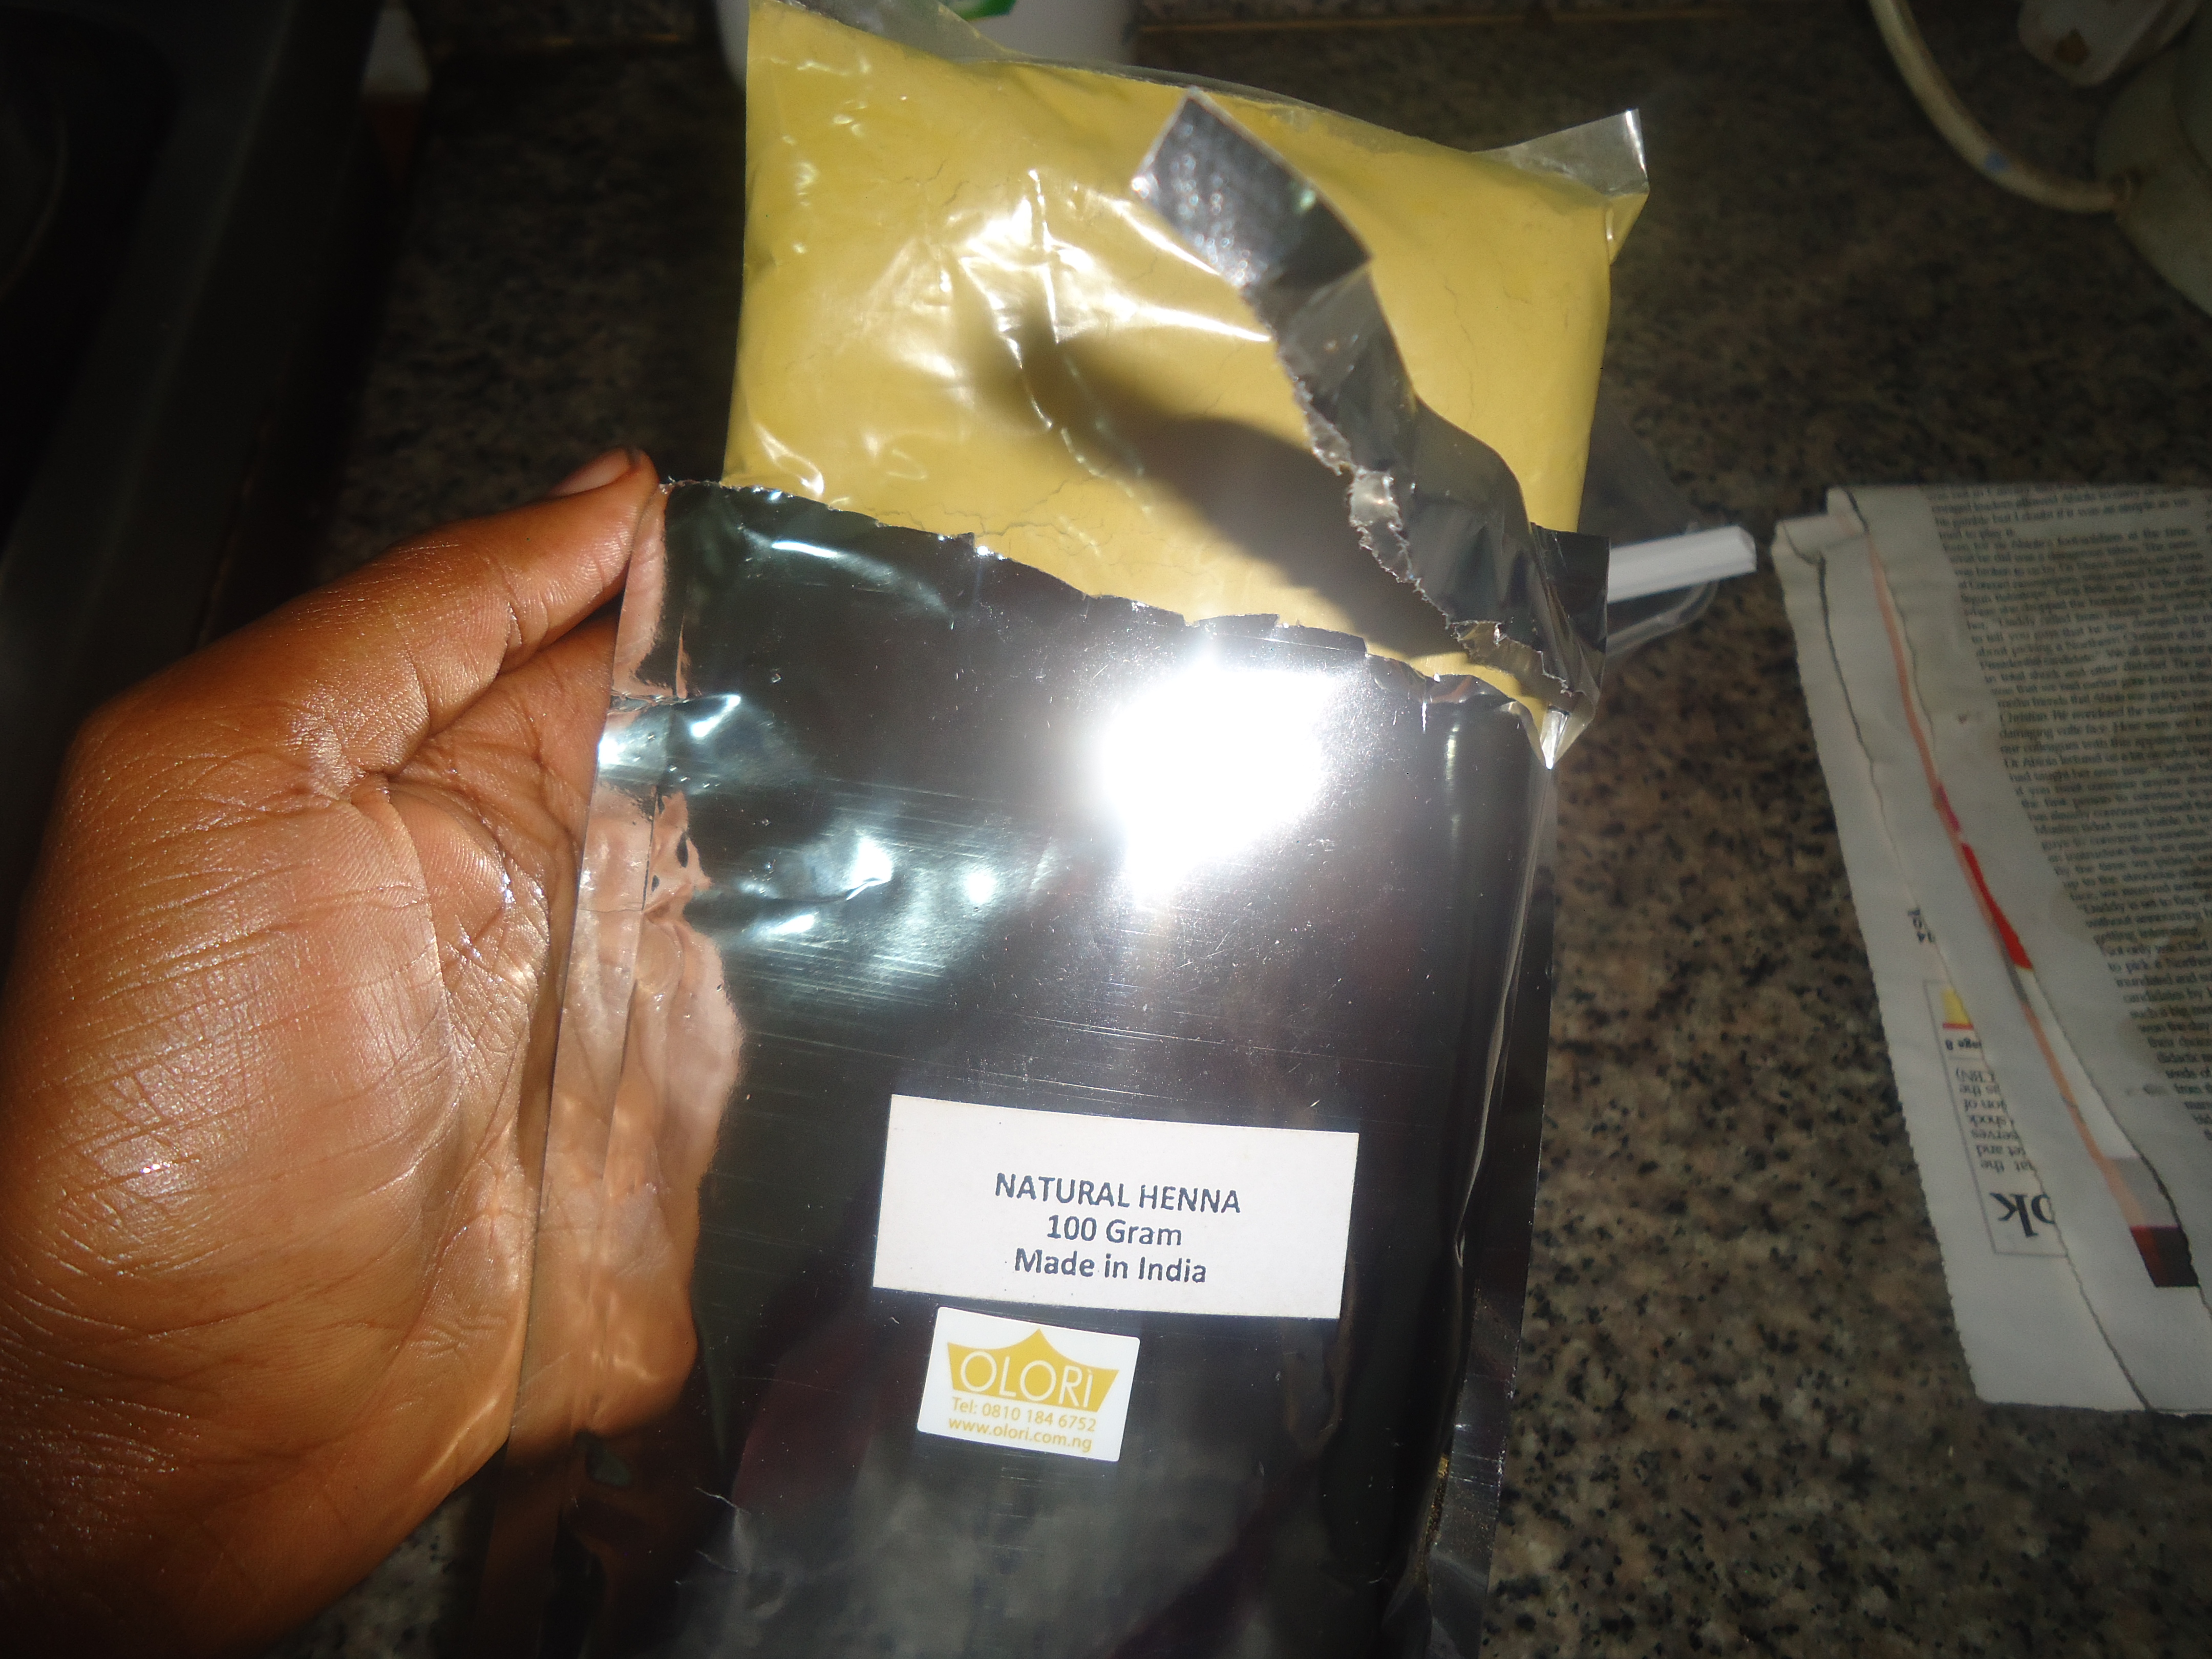
Olori was running a sale (still on) and Henna was 50% off, so I thought it was a great time to try it, not to mention a cheaper alternative to buying products especially as I had a full basket back in my room in Calabar. Henna is no longer discounted, but at full price, 500 naira for 100g is still a pretty good deal! It’s super smooth too! No twigs, no bits or funny particles. Very well ground! Get it here.

WHAT IS HENNA?
Henna (lawsonia inermis) is a plant. In Yoruba, I believe it’s known as laali. The leaves are dried and crushed into powder, and it is this powder that can be used to dye hair, hands, make beautiful temporary tattoos. In addition to working as a natural dye, henna also possesses super strengthening qualities.
I was interested in the strengthening, but also curious to see how the colour would turn out.
Henna can be used on all hair types. On black hair, it does not change the colour dramatically, but gives red highlights. It is also believed to make hair silkier, and encourage curl clumping, or loosen the curl of certain textures.
Curlfriends on twitter and instagram gave me tips that were so helpful! 🙂 😀
I’ll be doing more henna in the future, so this isn’t a refined post of what or what not to do. I’m no Henna professional. It was only my first time so I’m just going to take you through the LONGEST Wash day of my life, what I did, and why.
-
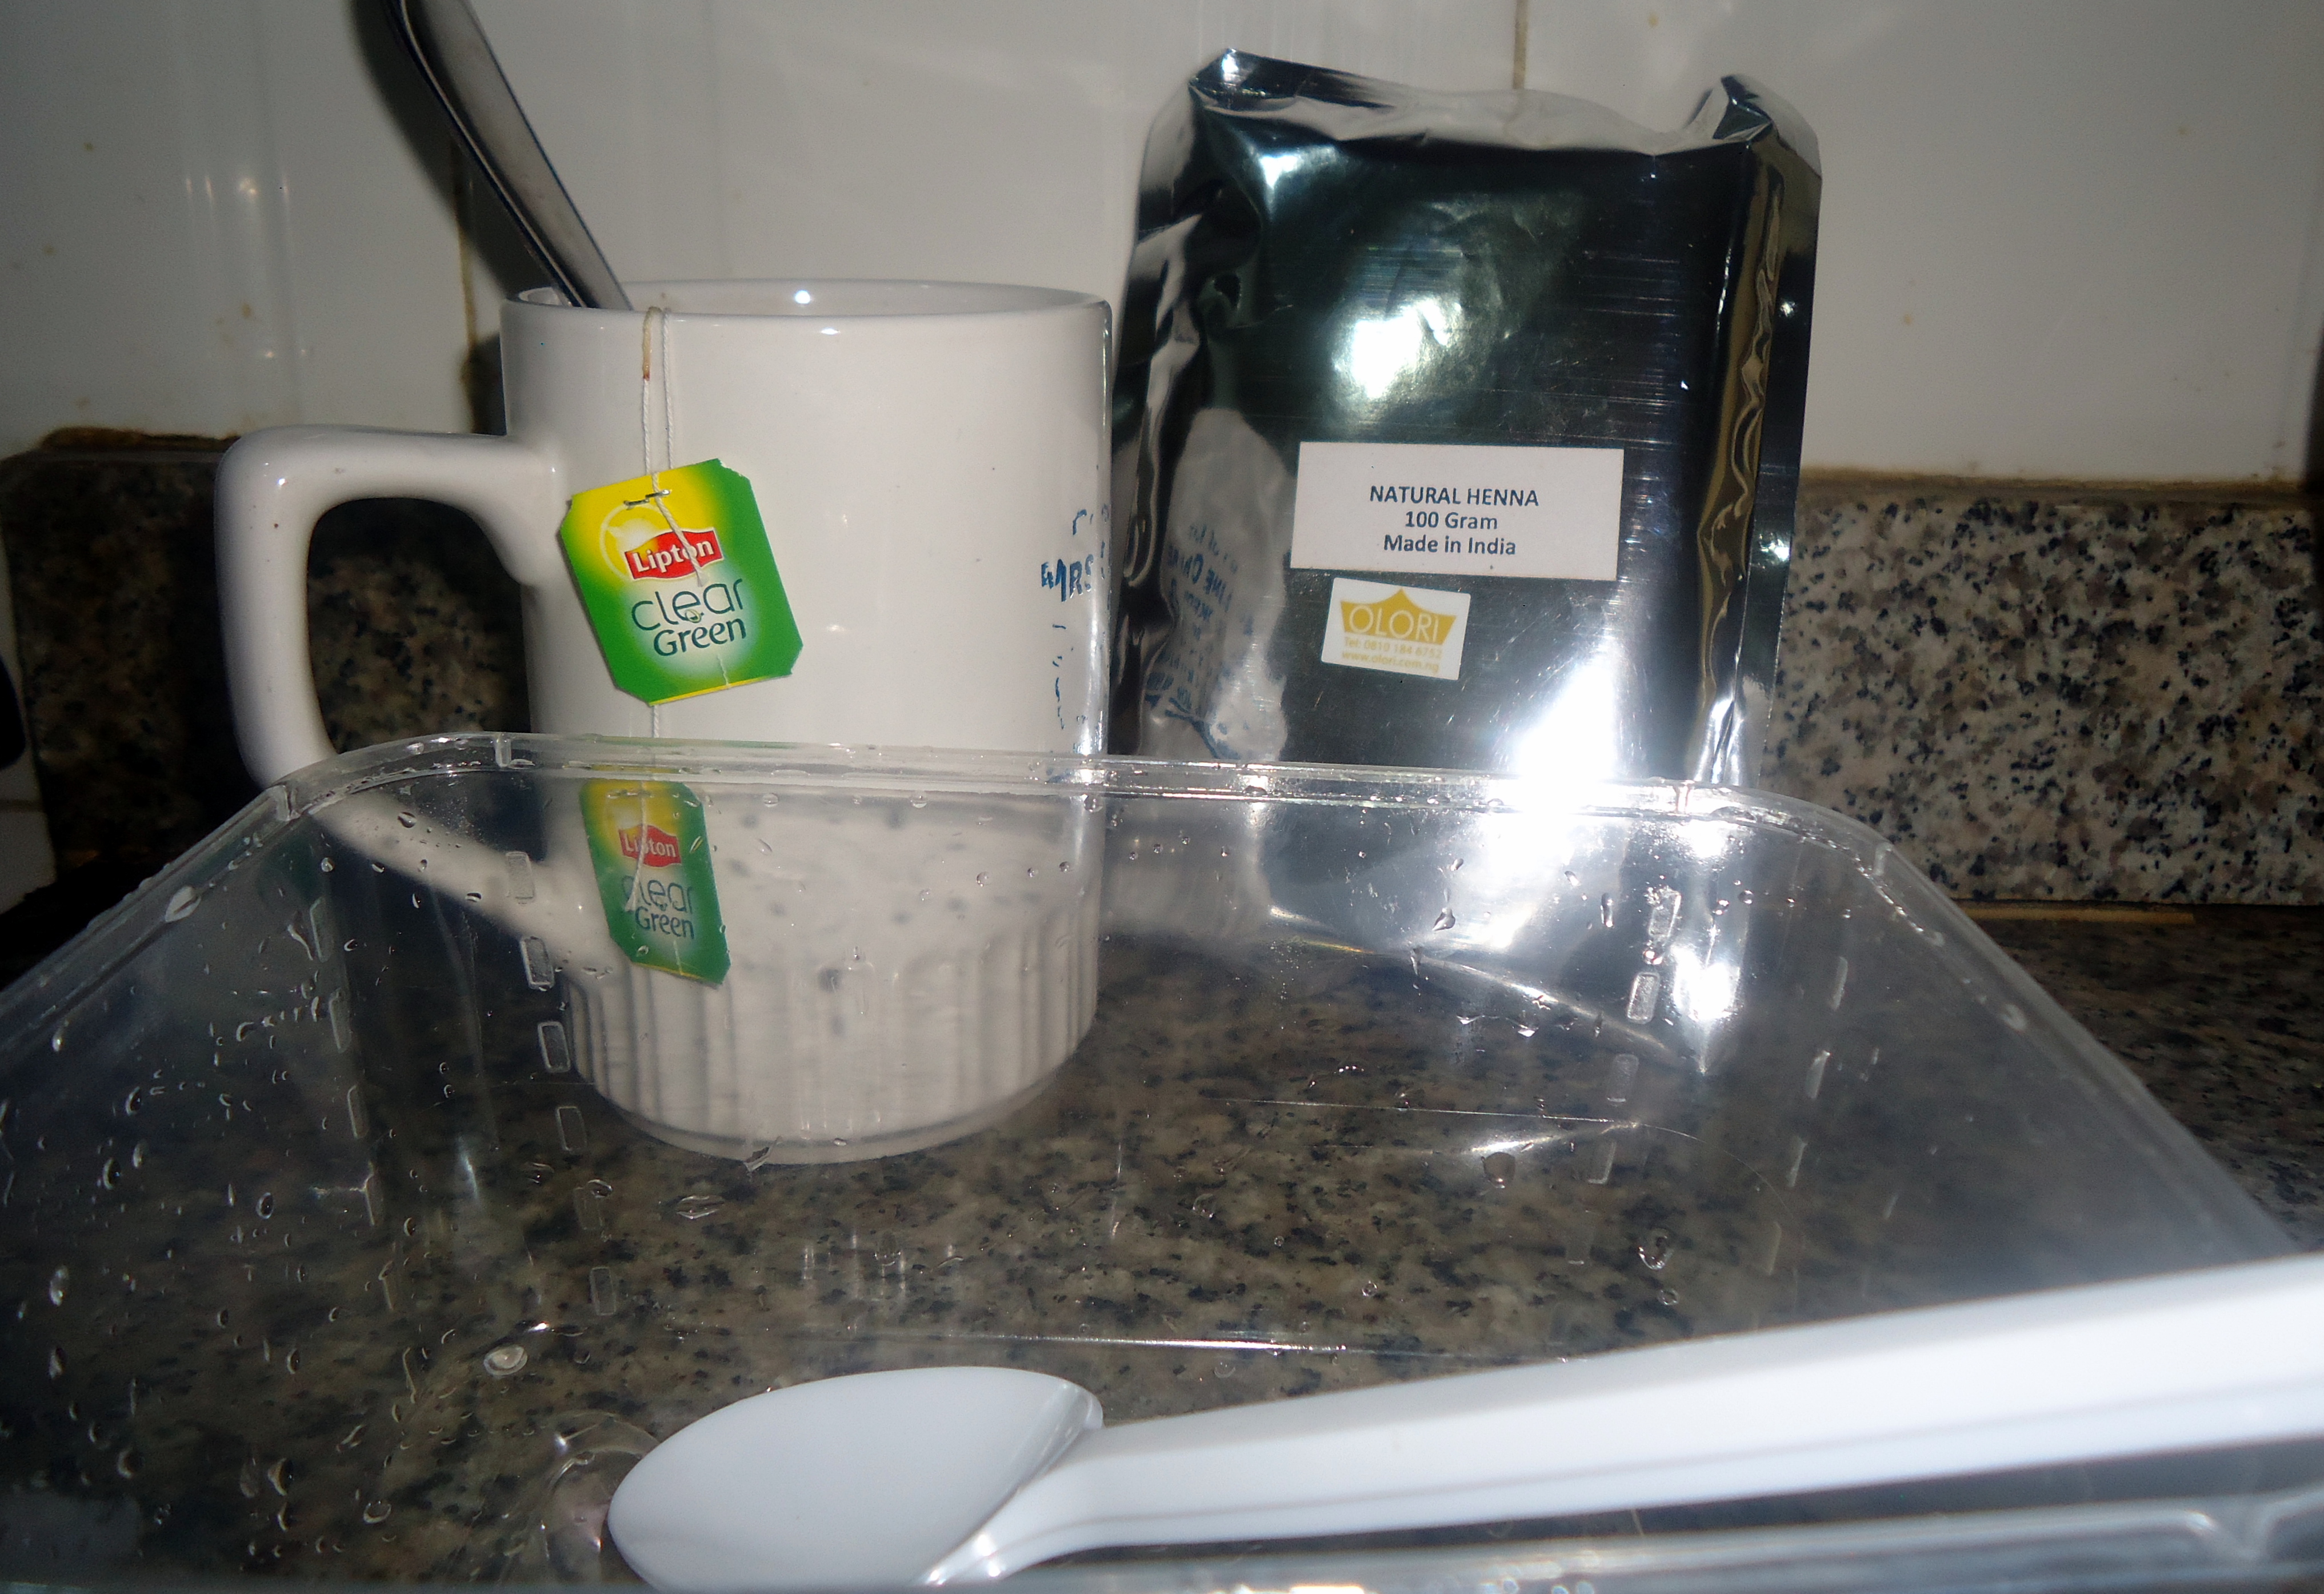
MAKE TEA
10pm. Tuesday night. I made tea in a medium mug with hot water and 2 bags of Green tea only, and left to cool.

100g Henna + 2 bags of tea
-
ADD TEA TO HENNA
Mixed 100g Henna with the green tea. A mildly acidic liquid like tea is needed to encourage dye release.
-
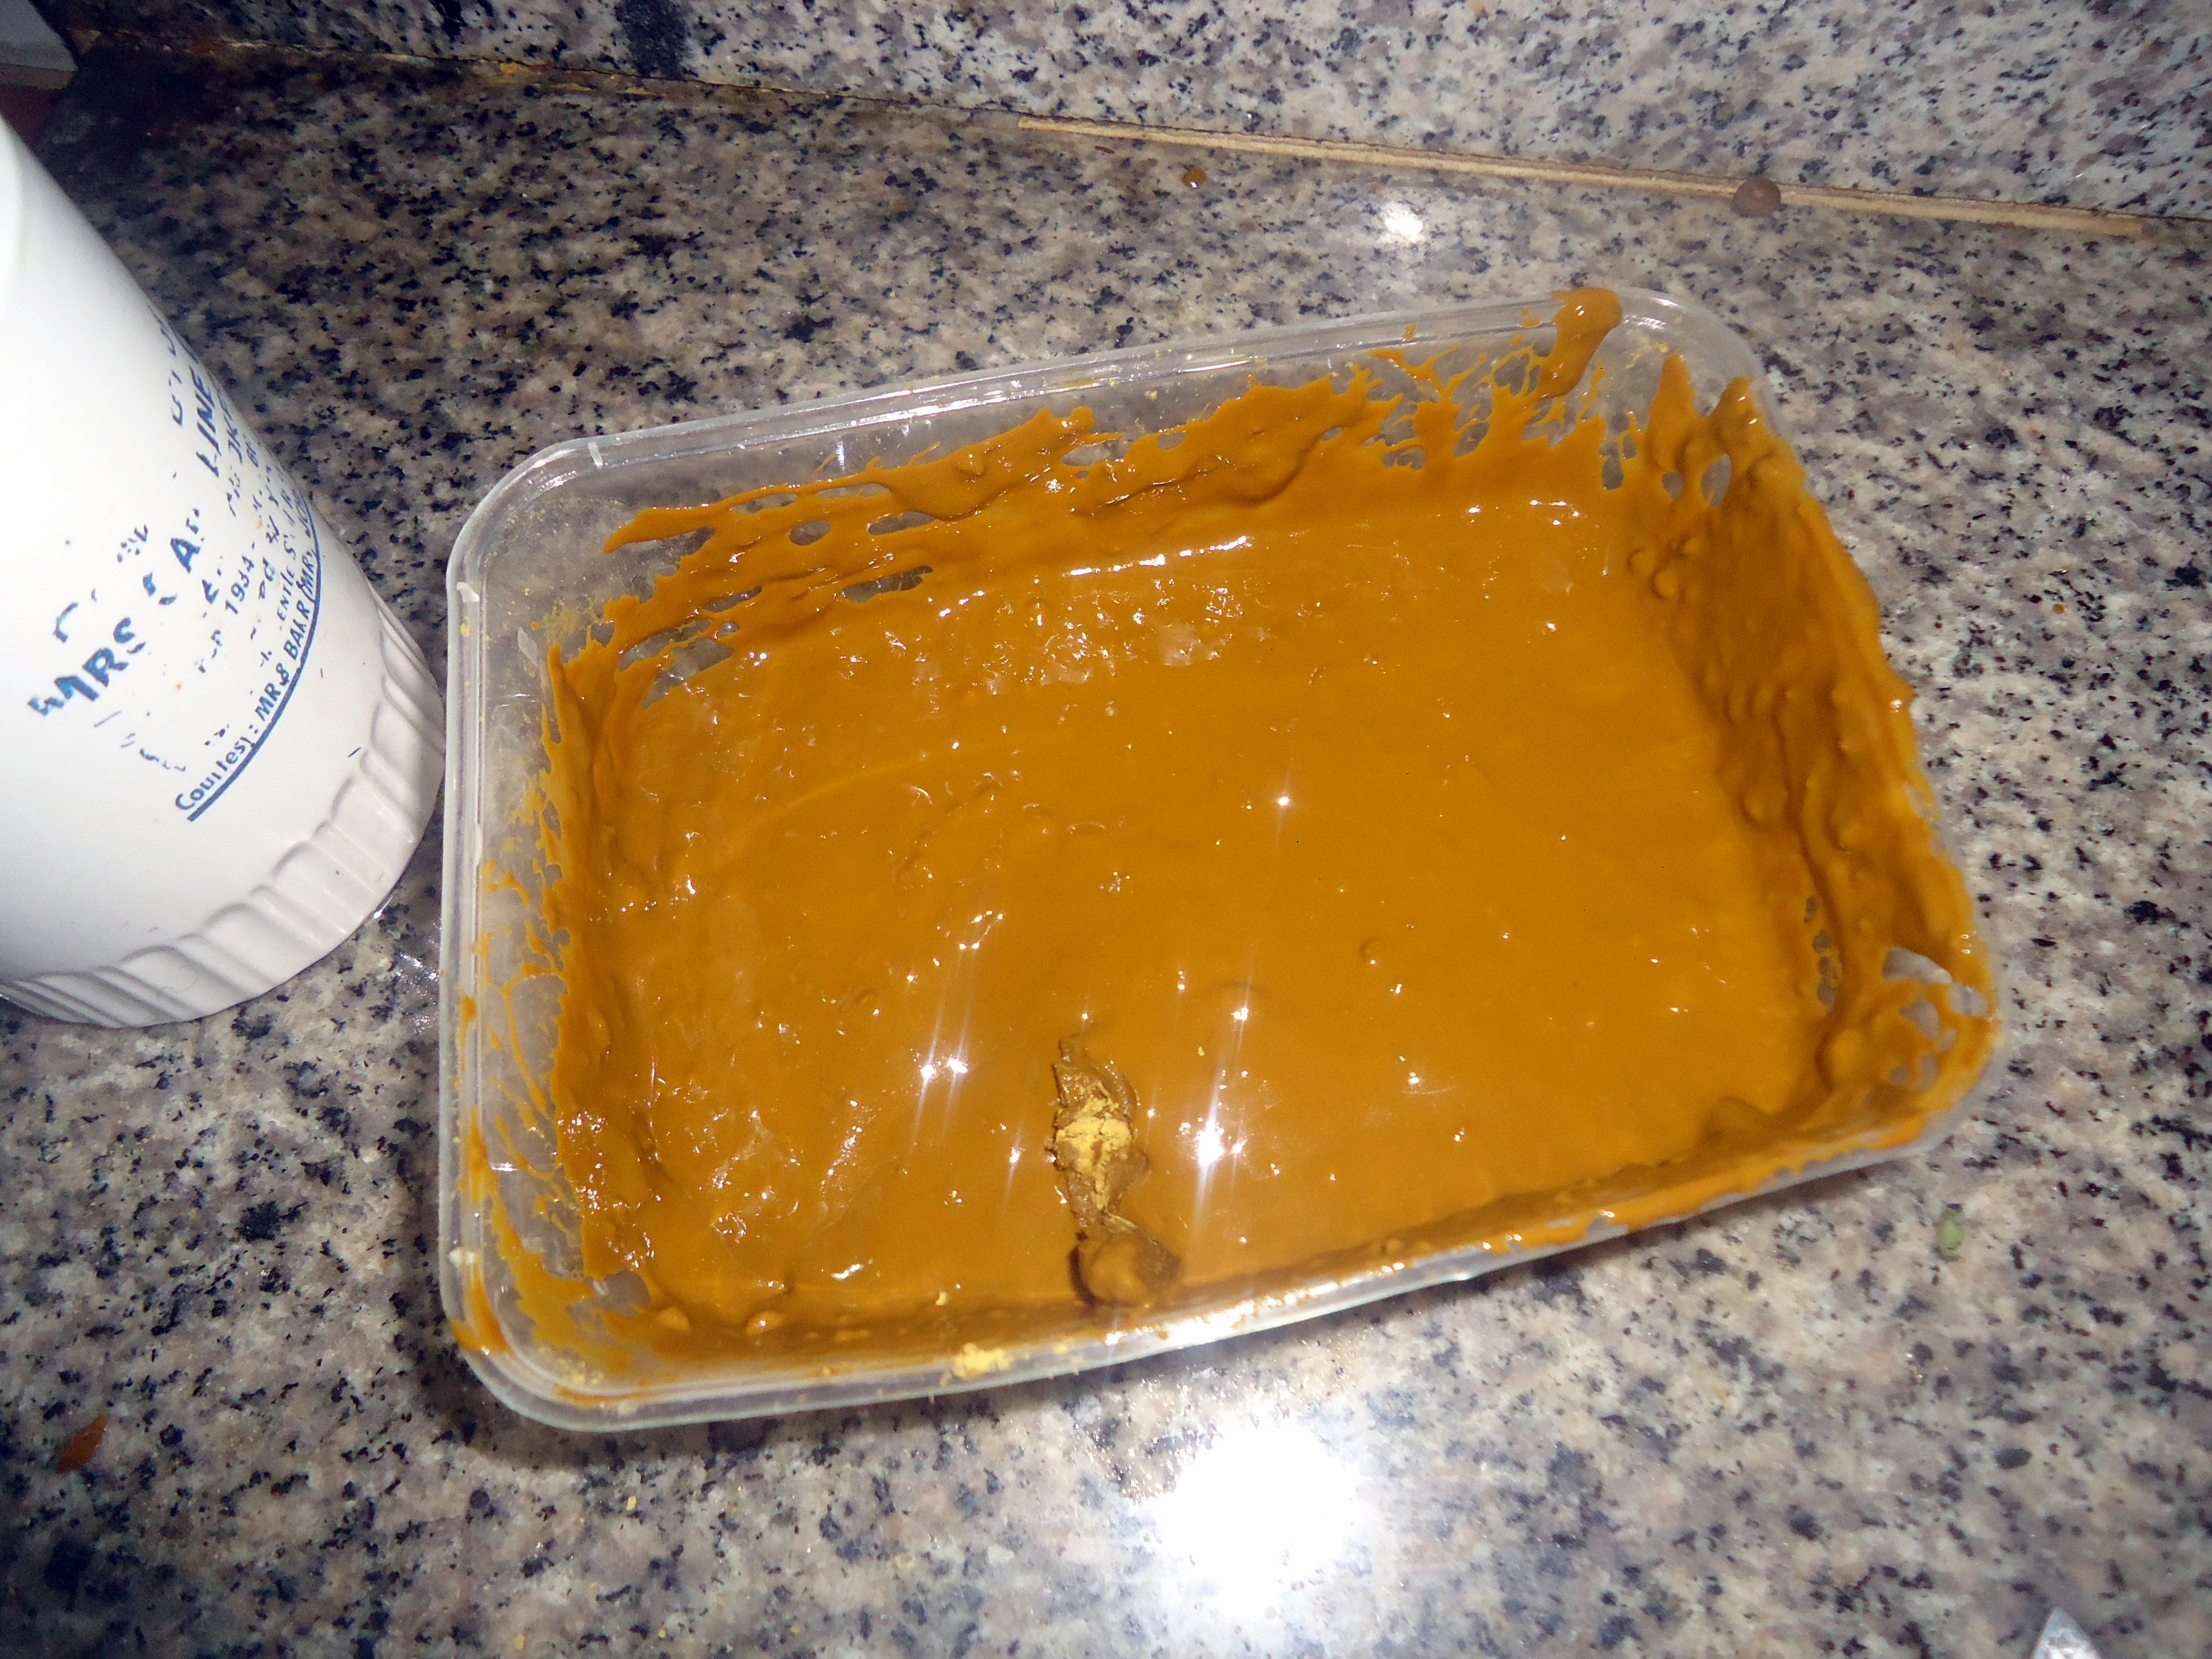
LEAVE HENNA PASTE TO SIT OVERNIGHT
Henna is usually best left overnight at room temperature, for dye release.

Look at that! So nasty! I wrapped it up in newspaper, so nobody would worry, or ask me questions. You know it looks like poop potopoto!! ( ._.)

Henna paste
I like the smell though. So earthy and warm. 
Oh. I also pre-pooed my hair with coconut oil, after taking down my braids, and I chunky twisted for bed.
-
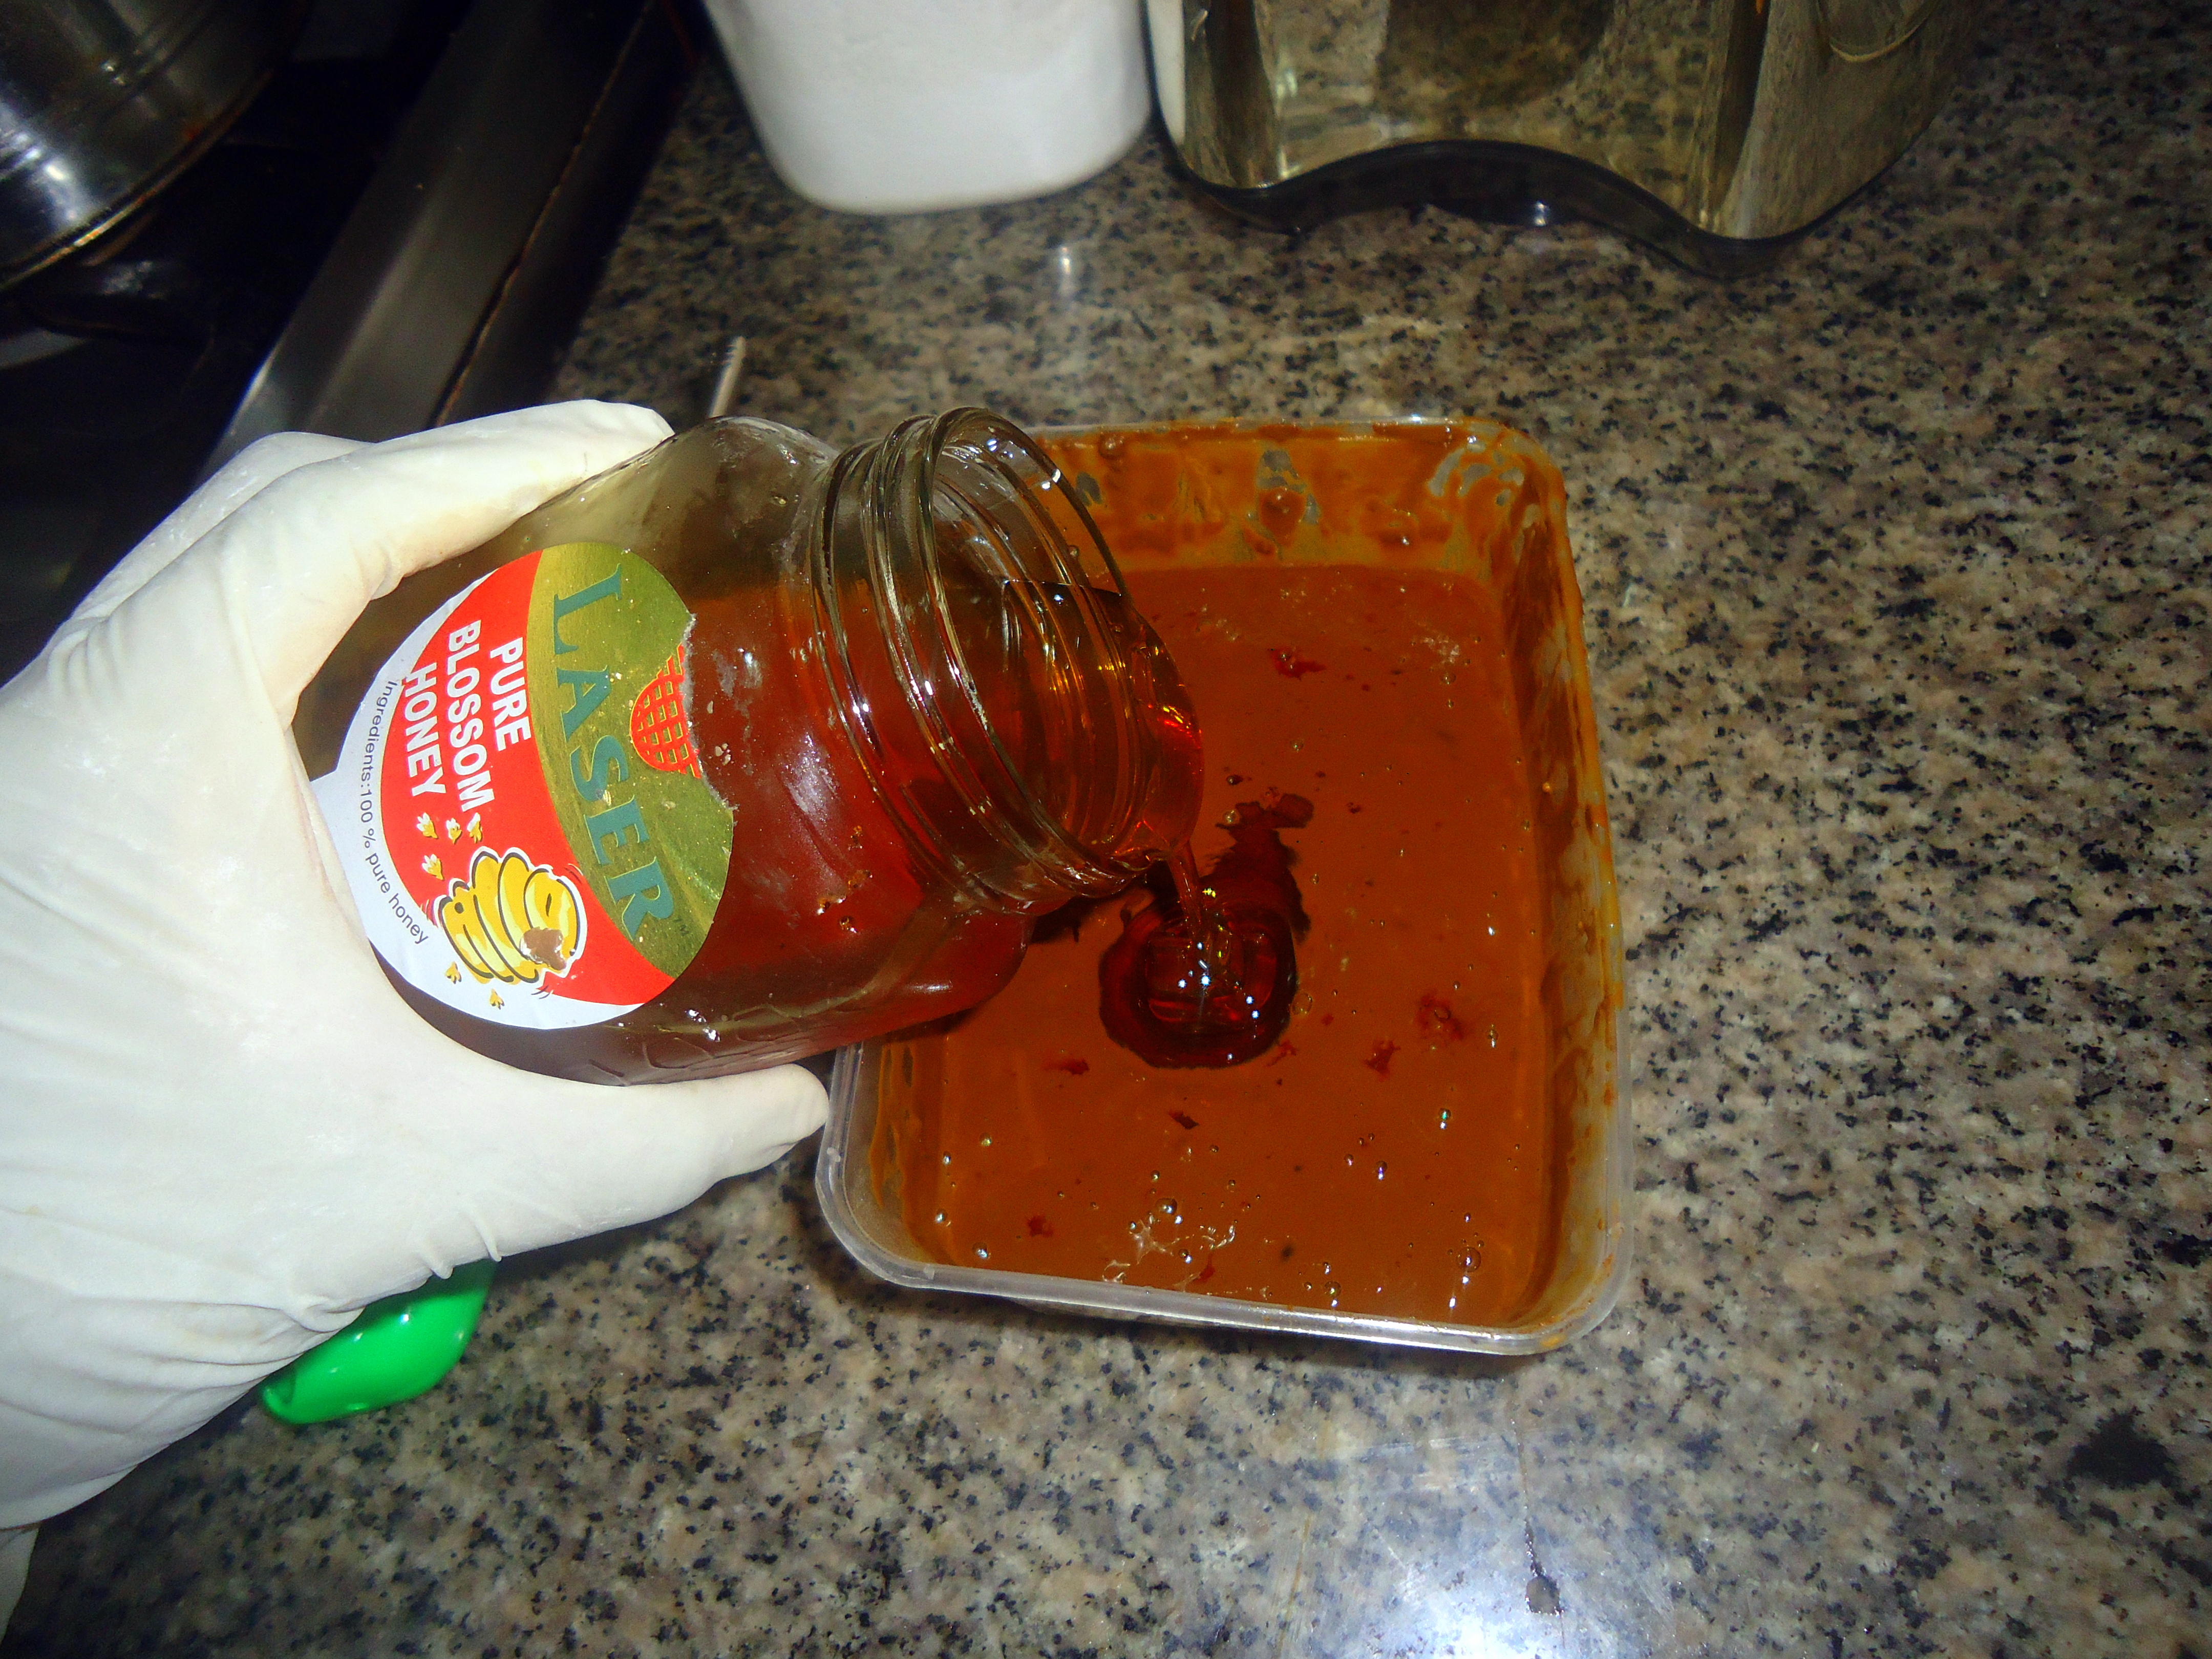
ADD SOME HONEY TO THE MIX
9am. Wednesday morning.
I added some honey. It’s best to do this shortly before application. This helps it rinse off easily.

-
COVER UP, AND APPLY!
10am.
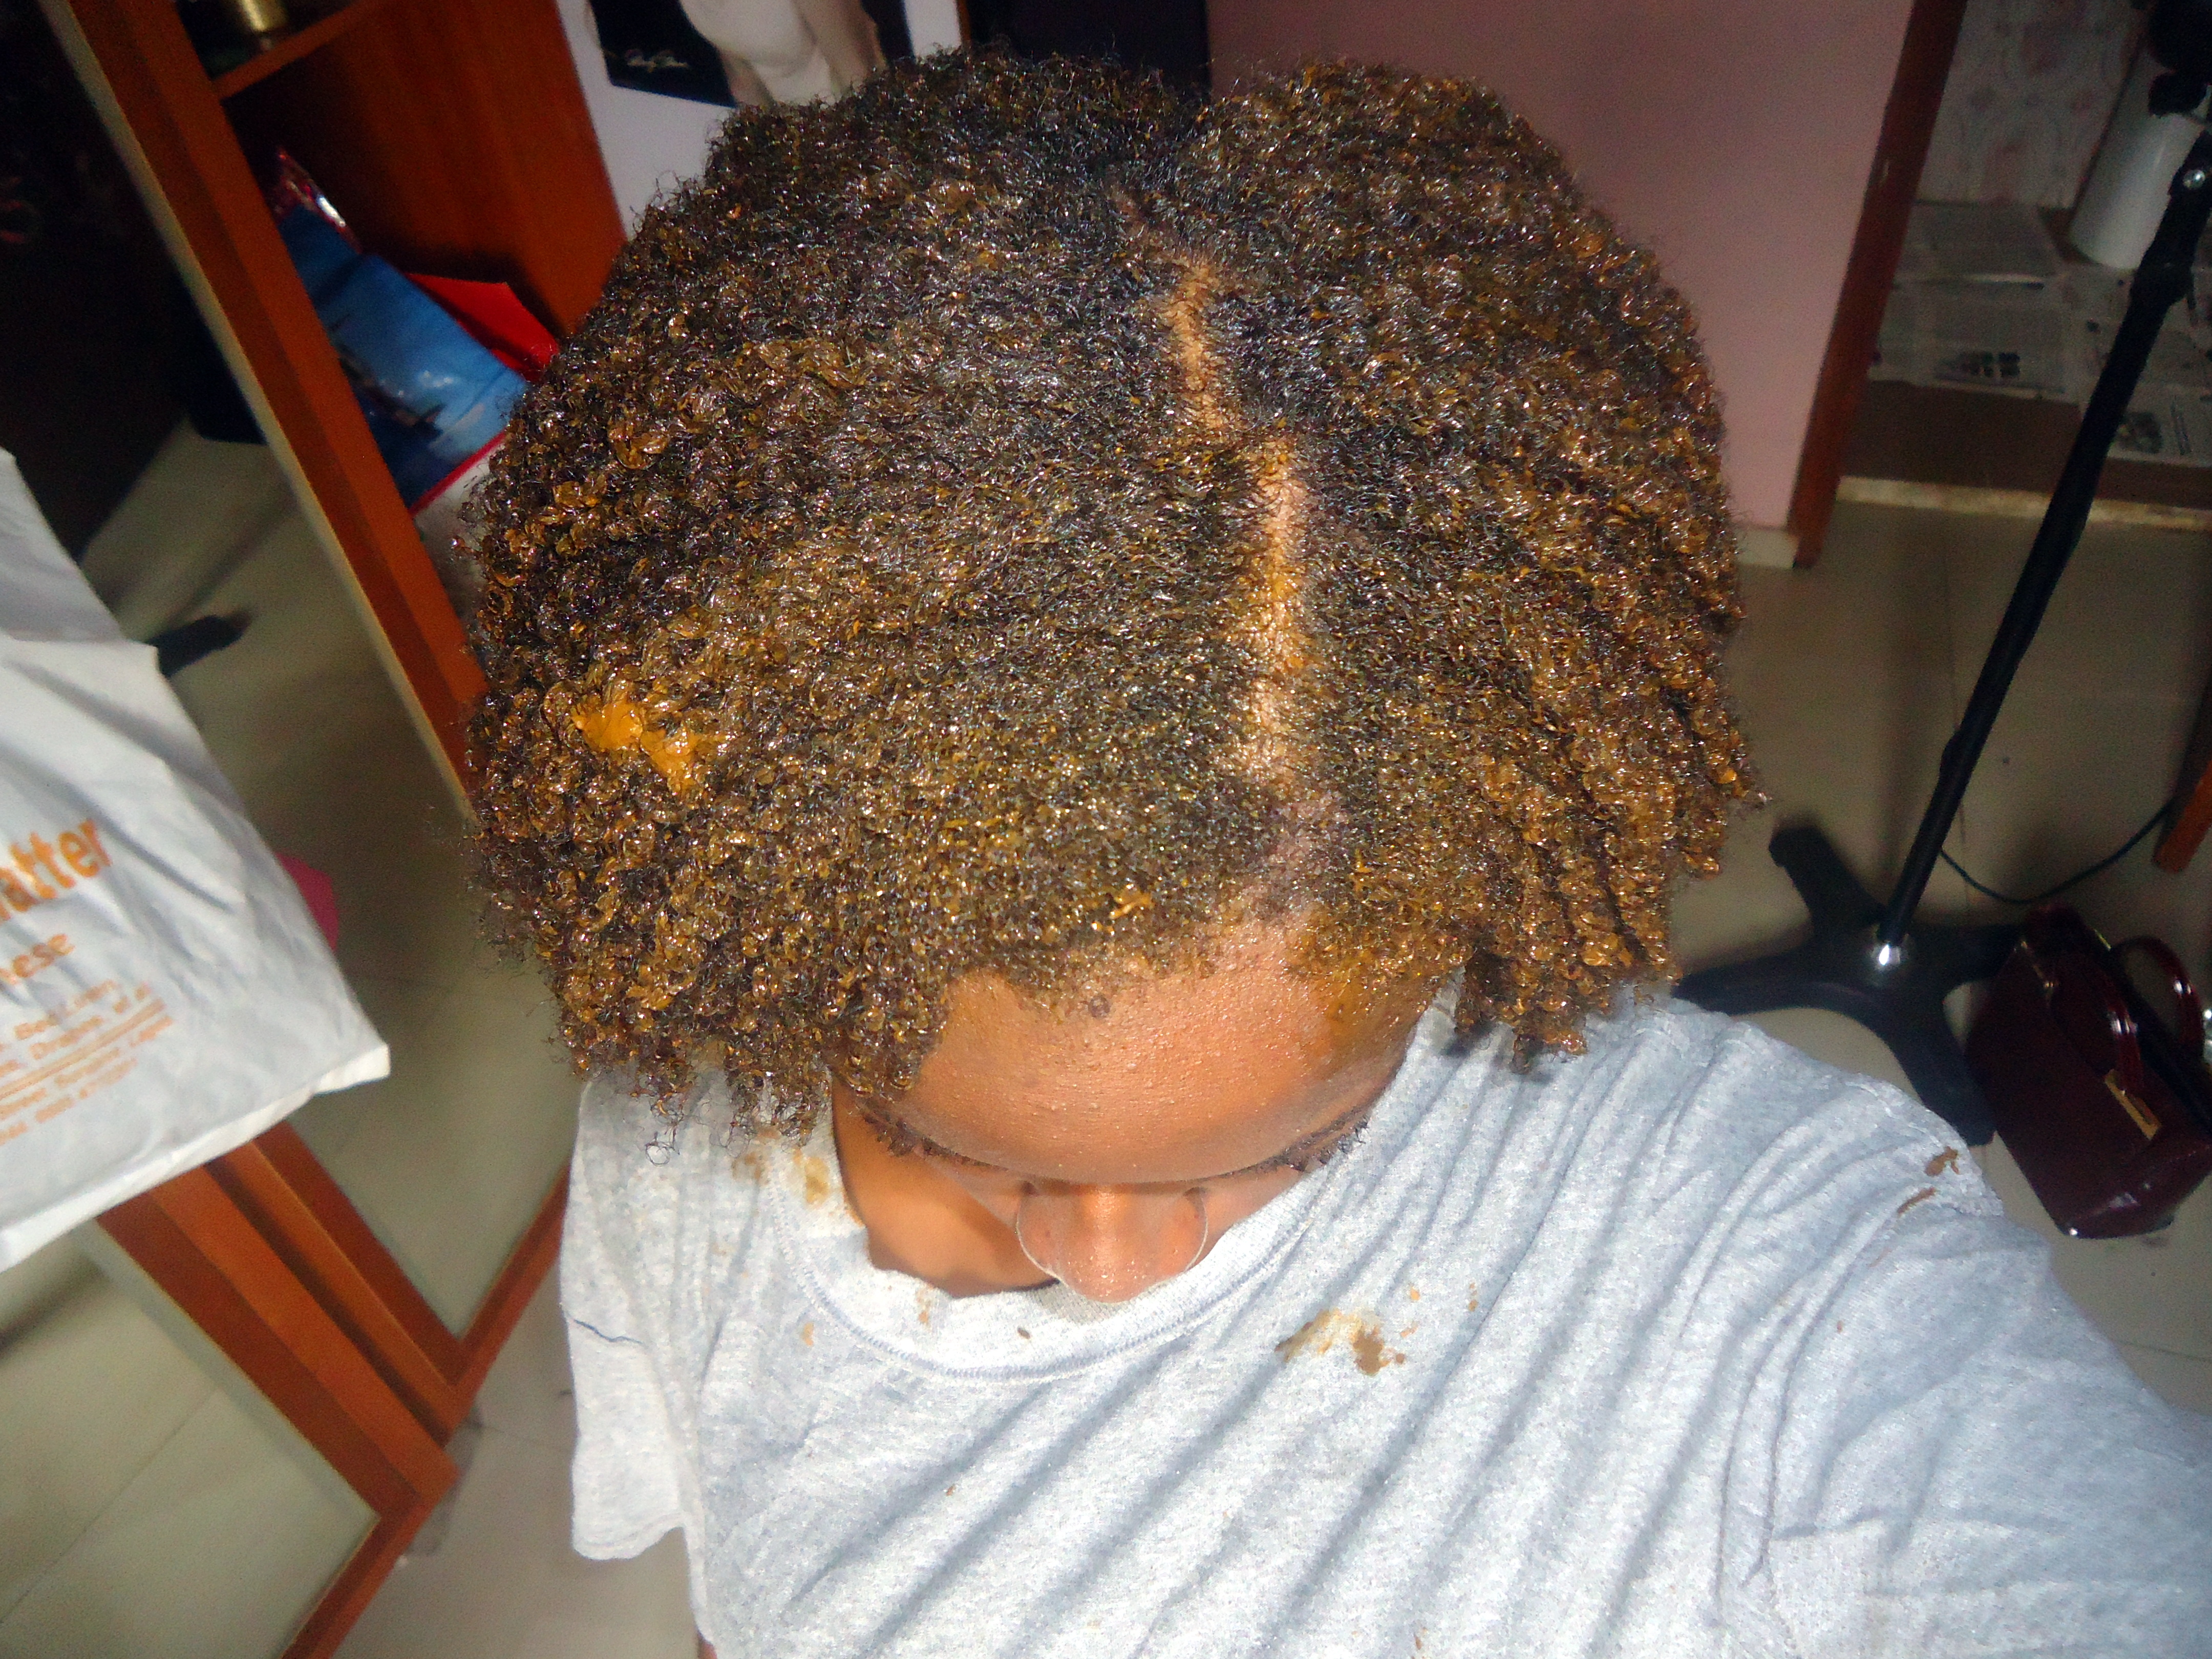
Armed and ready!! Old t-shirt on, wore it the wrong way too. Disposable gloves on both hands, check! (1 pair cost 50 naira at my local pharmacy) I covered the bathroom floor with newspapers, and then I started my henna application, taking care to get it over every single inch of hair! (Currently measuring 8 and half to 9 inches, medium-high density hair) I thoroughly cleaned out the bowl. Any less henna would not have been enough.

I covered more of the floor with newspaper after this photo was taken
It took me about thirty minutes to apply.
The henna weighed my hair down, so I got some hang time!

It was also exciting to see my S- and O-shaped curls come alive!!

I contemplated going about like that for a bit but nope, the hair at the front swung towards my eye twice. Thankfully, it didn’t sting, and I didn’t want to tempt it a 3rd time.
-
WRAP IT UP!!
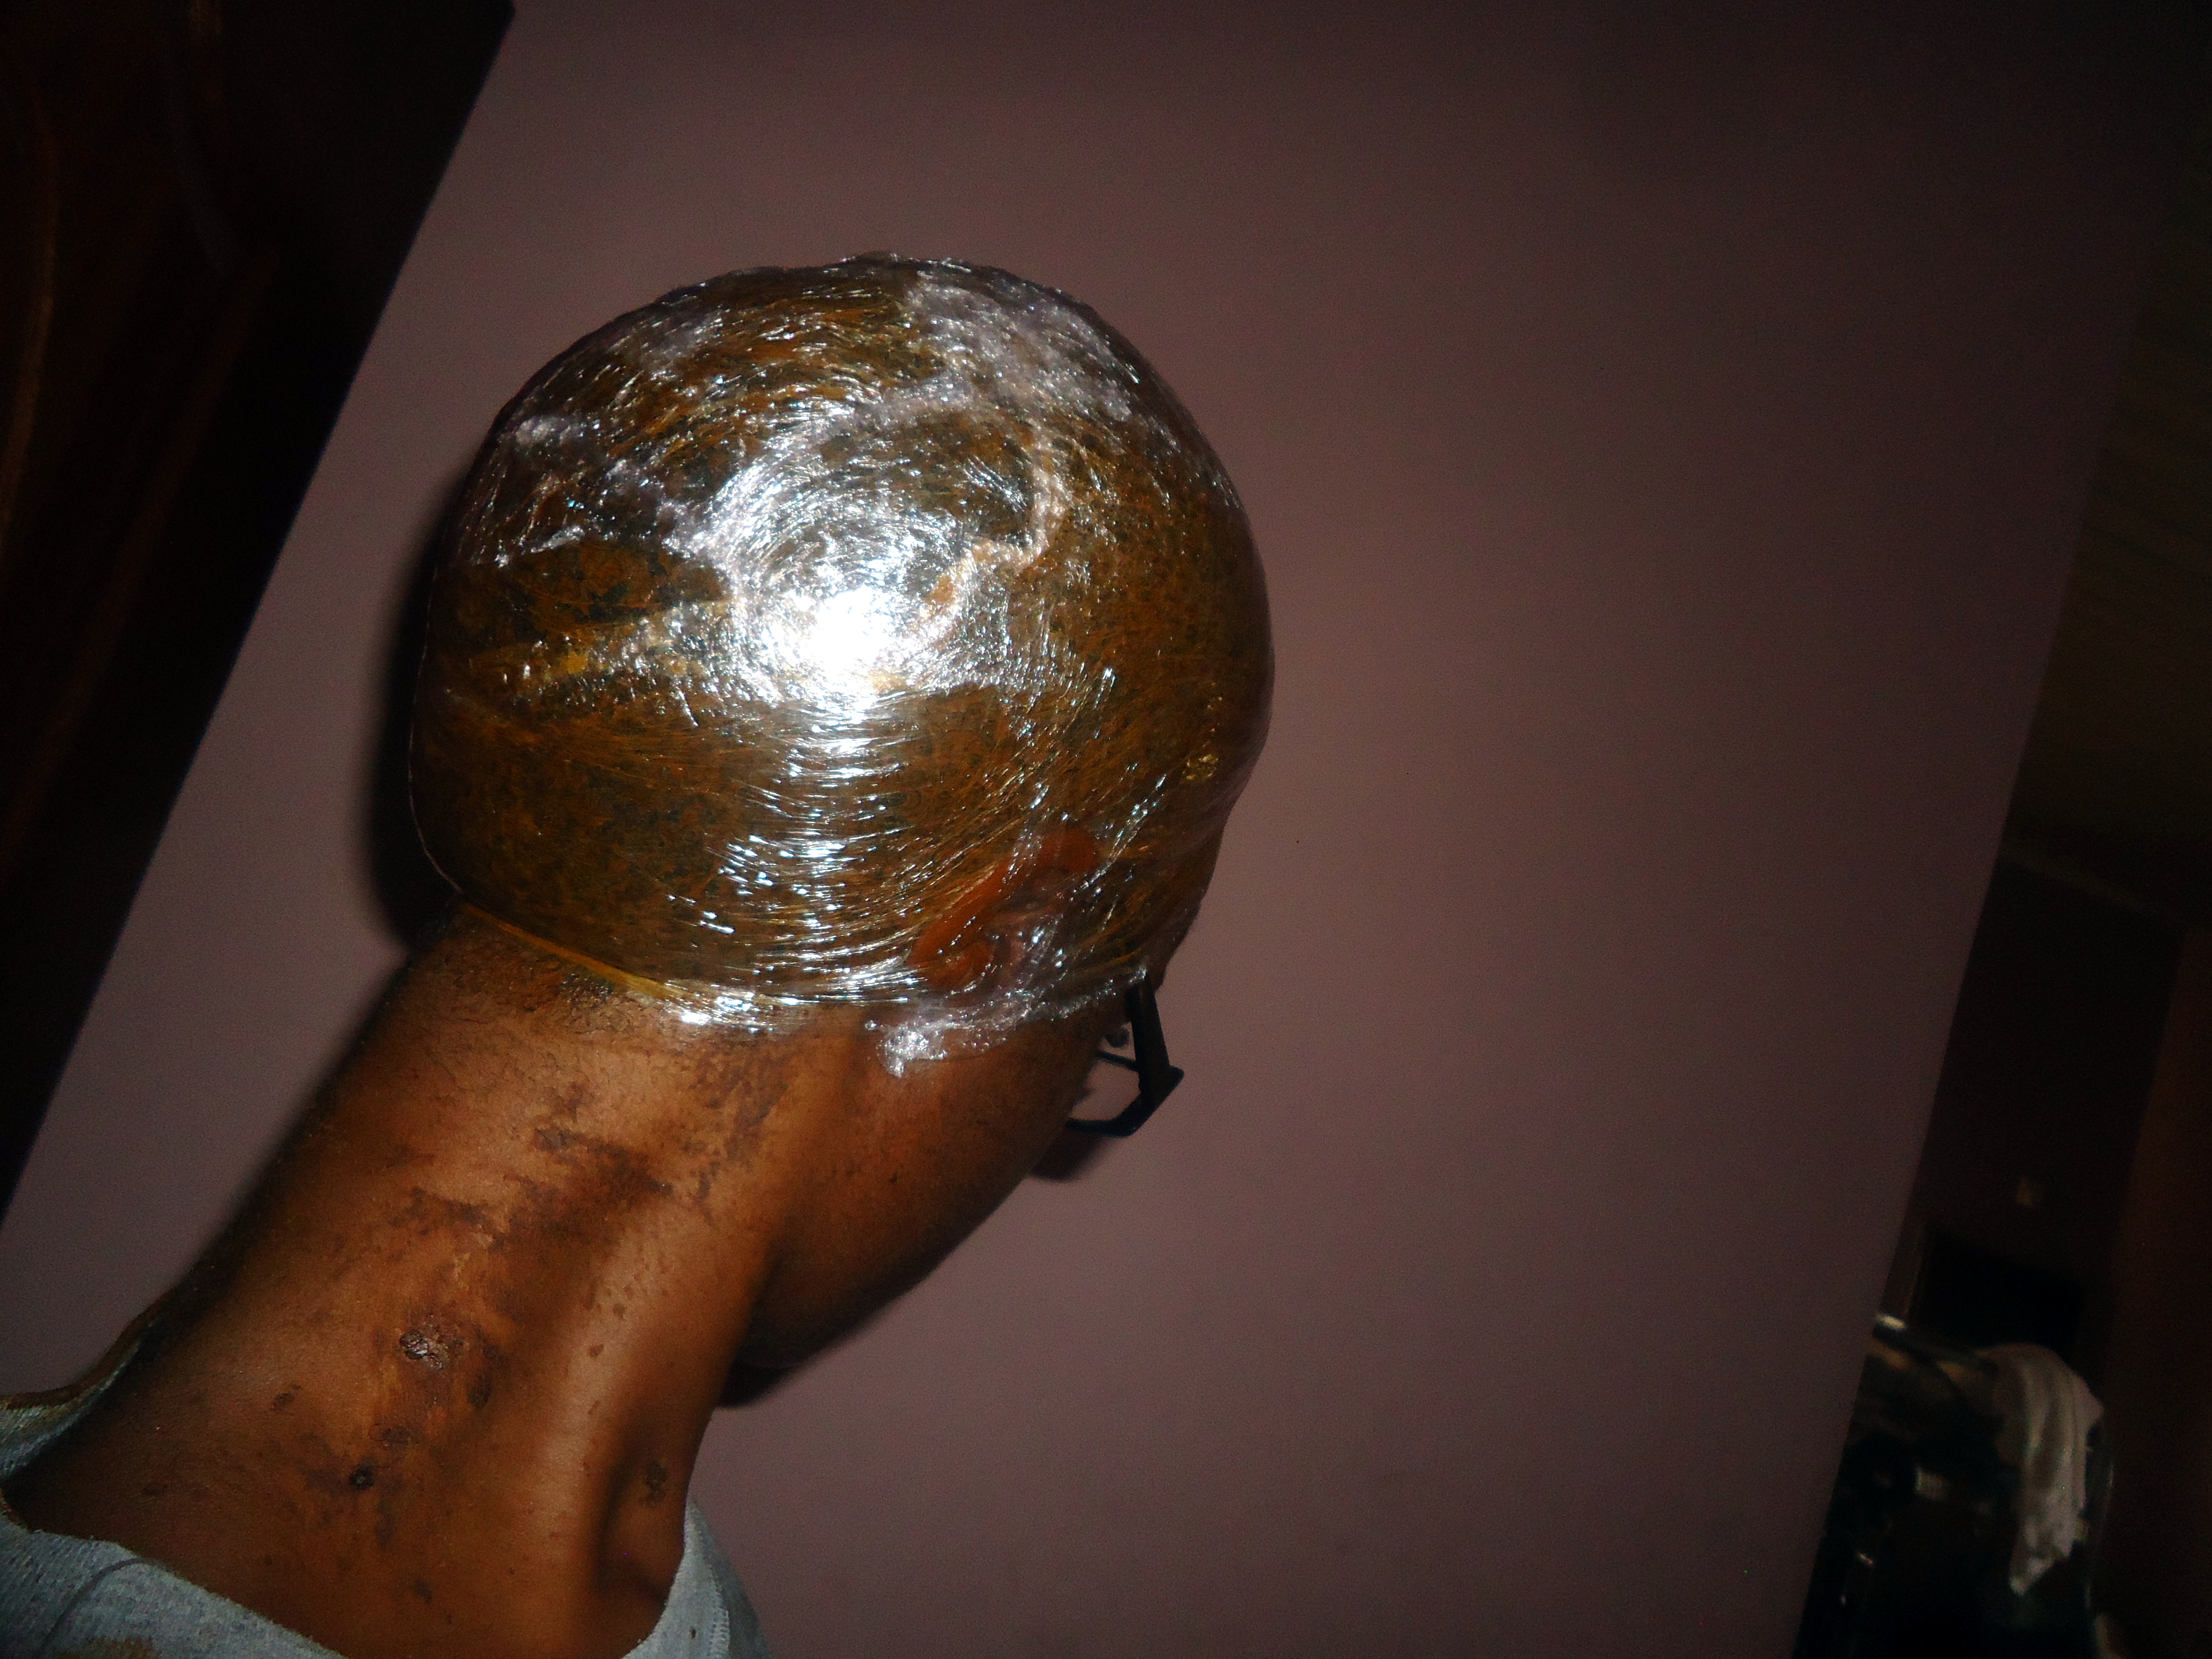
I wrapped my head securely with clingfilm. I considered wearing a shower cap but this was definitely more efficient. According to Curly Nikki, 4 hours is the minimum time for henna to be in your hair, to maximise colour uptake and the strengthening benefits.

wrapped tight!
I was advised to steam, but I don’t have a steamer. I was busy doing chores and that must’ve worked up some heat cos I started dripping henna. I put a scarf on my head when I had to go out to buy something and the Lagos sun was more than happy to beat me, to be my natural heat source. I dripped even more. I hoped no one noticed my dabbing at the strange substance. ( ._.)
-
R-I-N-S-E!!!
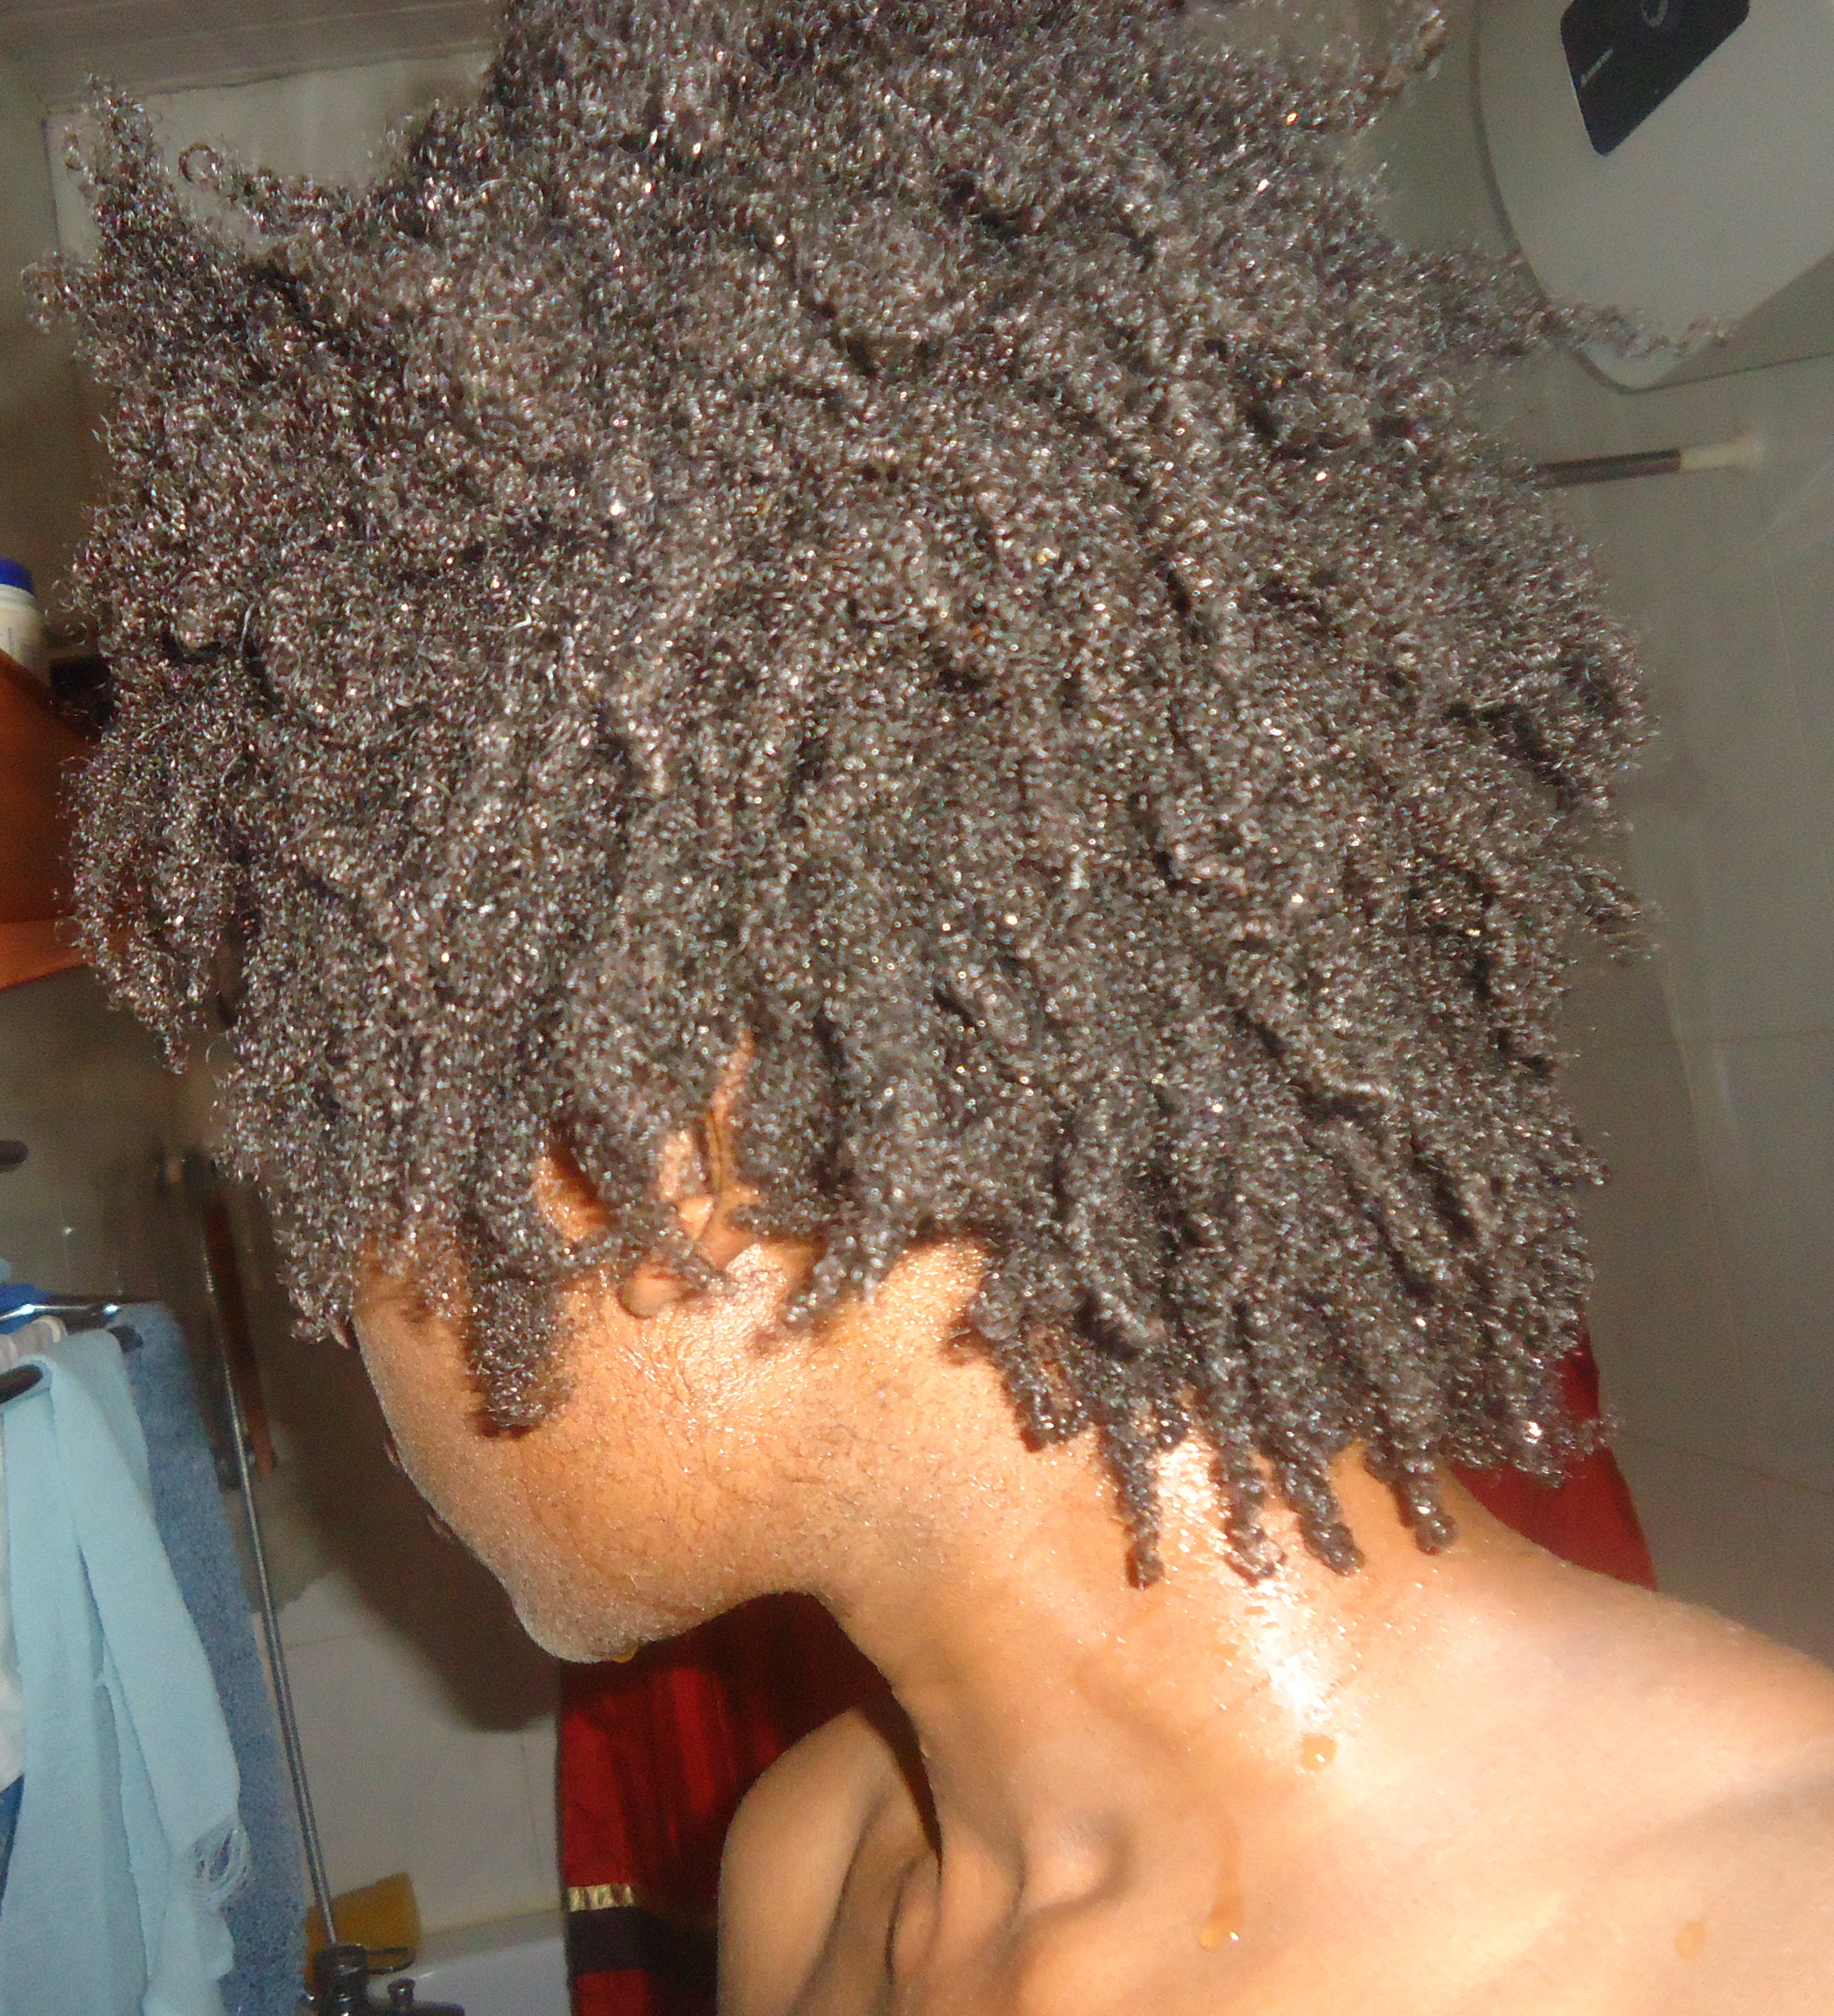
3:30pm. At first, I filled a bowl with water and put it on a stool to dunk my head in, as I don’t have a bath tub in my room. That proved to be a bad idea, so I just took off my clothes and went under the shower.
This took a while, and I didn’t want henna stains on my fingernails so I rinsed with gloves on.
–OBSERVATIONS
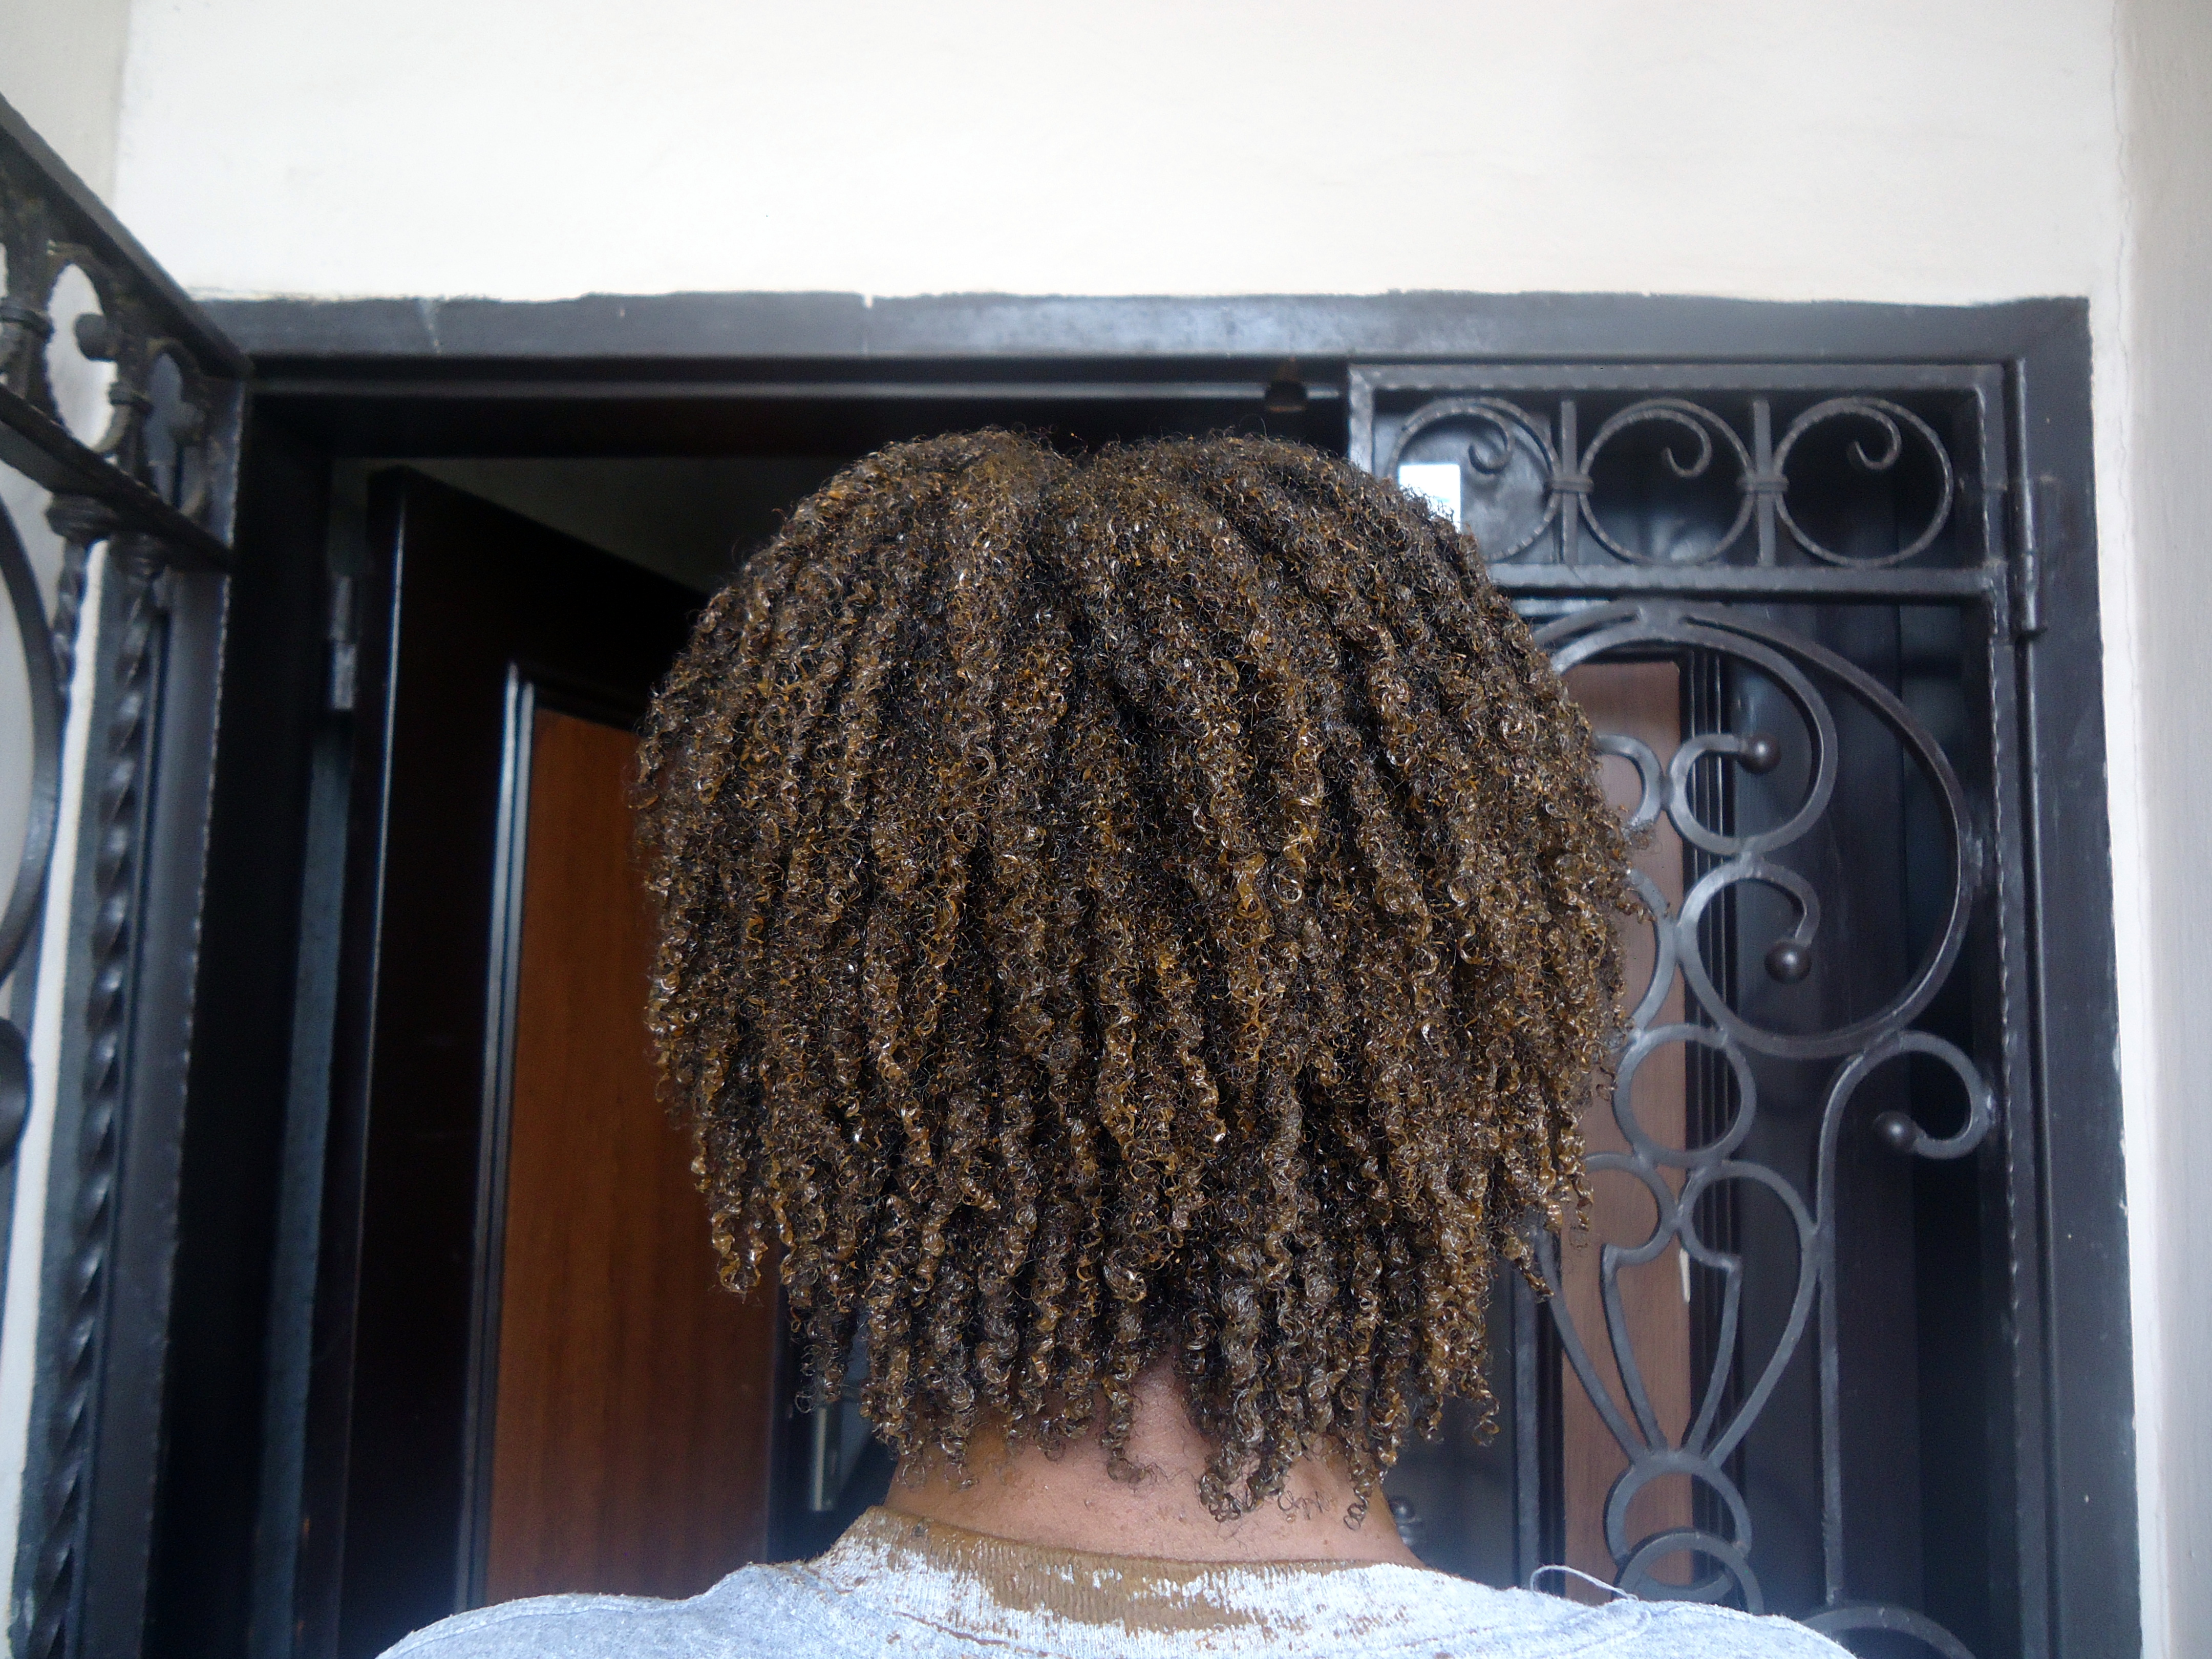
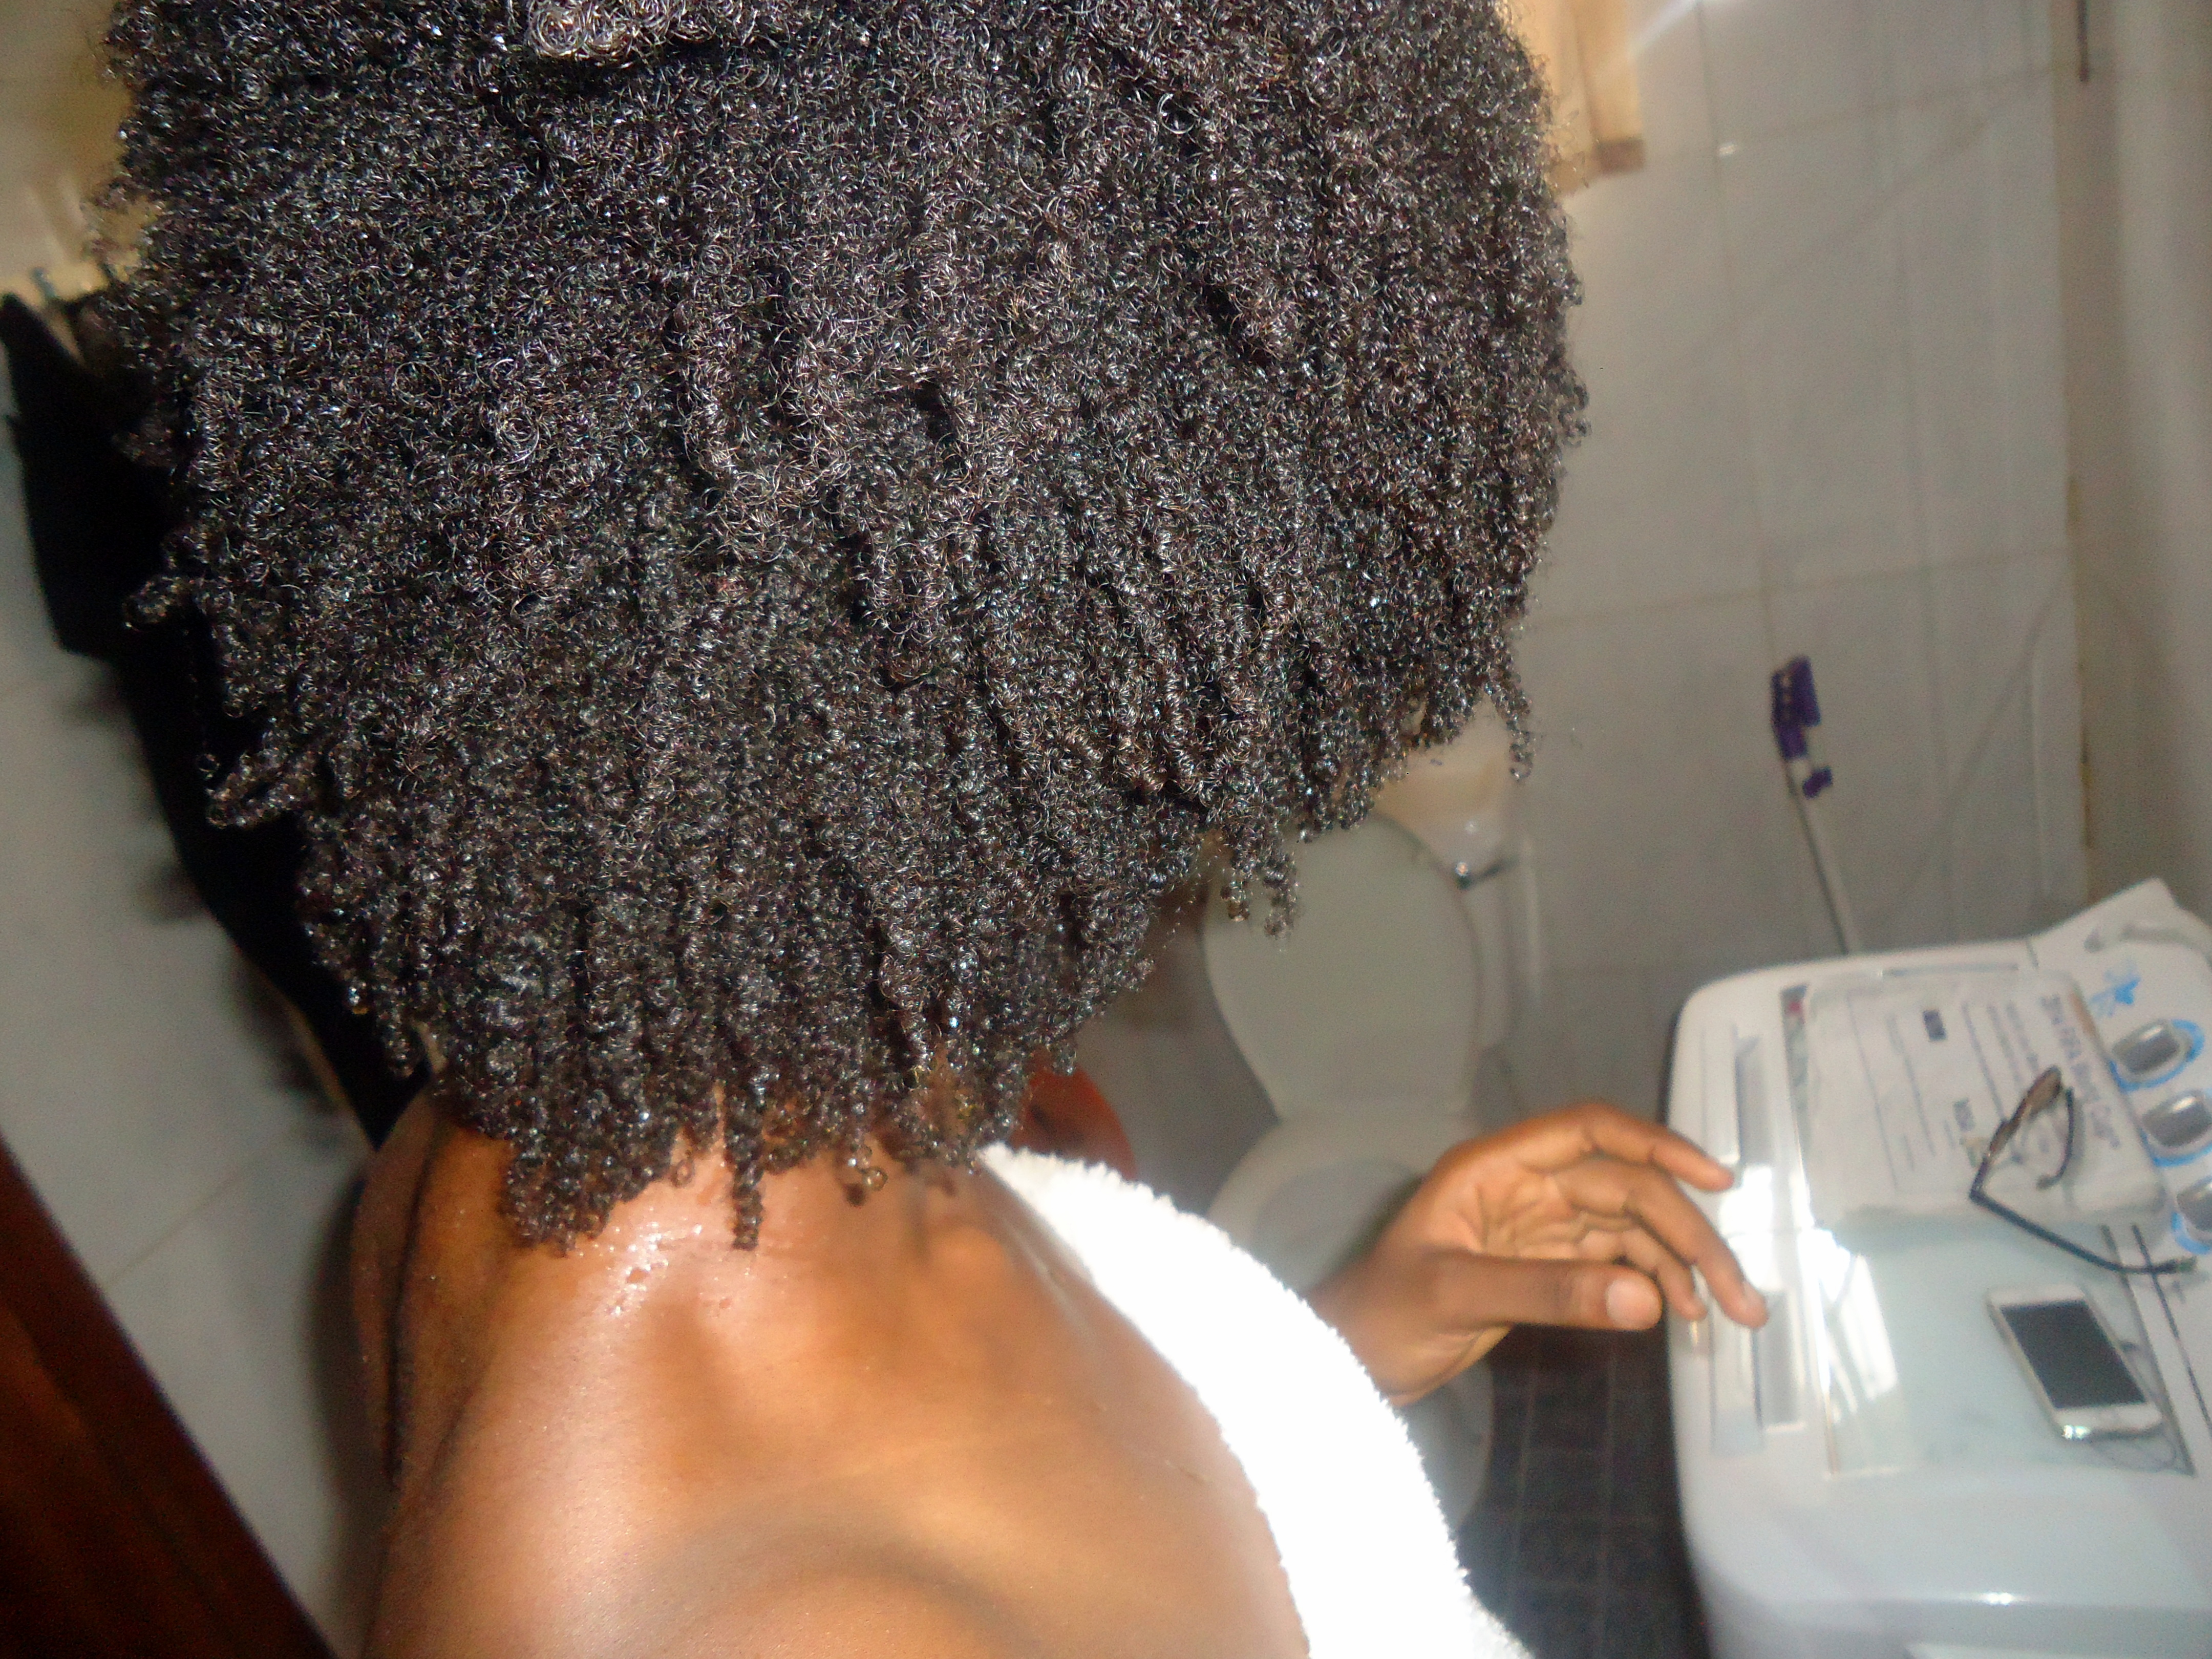
I emerged with clean hair, still trying to hang, still some evidence of curl clumping.
Henna is pretty drying (I read and heard), so I had great expectations of iron sponge hair. It is actually quite drying, I experienced this, but it wasn’t as bad as I imagined.
I noticed a slight change in my hair colour. It was kinda brown-ish in the light. What do you think?

left side, facing the light

right side, backing the light
Was my hair stronger? Maybe. I did this on Wednesday after taking down my braids. On Monday, I had washed and deep conditioned my hair in braids so hair was super clean and I didn’t need to wash it before henna. Hence I didn’t detangle or anything, so of course, my henna application and the rinsing afterwards, left me with hair in the sink. Mostly accumulated shed hairs, fairly normal consequences of the pressure of having braids in for 4 weeks? Next time will be different so I’d be able to see just how strengthening henna is for me.
-
FOLLOW WITH A MOISTURISING DEEP CONDITIONER!!!
I generously applied coconut oil and olive oil to my hair, before putting on my moisturising deep conditioner, trying to make sure every inch of hair got some. Henna is a super strengthening protein treatment, and too much protein can leave your hair very very brittle. This is why a henna treatment should be followed with a MOISTURISING, PROTEIN FREE DEEP CONDITIONER. That was another DIY thing I’ll be sharing with you shortly. 😉

DC in my hurrrr. Guess what it is?
I wrapped my deep conditioner filled hair with cling film and faced the rest of the day. One of the tips I got was to leave DC in for just as long as the henna, or more and I tried, I really tried, but by 10pm I was tired, I had a headache, and I didn’t trust the ingredients of my DIY deep conditioner to make it till the next morning. So I got into the shower again, and rinsed out.
-
RINSE OUT DC, (MOISTURISE AND) SEAL, DRY.
At about 11:30pm, I was done rinsing, and I’d chunky twisted my hair with no leave-in (because I had none), and sealed with coconut oil. I prayed this would be enough for my hair as it has been in the recent past, and it actually was. My ends were hella dry though, so I noticed a bottle of Hair Fruits conditioner that had been sitting there for ages. I remembered my experiment from last year, using rinse-out conditioners as leave-ins and this was the saving grace I needed for my ends and my edges, the driest parts of my hair!! Score! Washday over. 24 hour journey no be small! 🙂

Hair in chunky twists, left to air dry. The End 🙂
The next day, I gave my bathroom a GOOD scrub and then went to get my hair done…
New hair and Salon Review in next post!! 😛
Do you henna? Why? What’s your process? Let’s talk about henna! 🙂
Love,
AB,
Xx
–
For more about henna:
Curly Nikki: here and here
Henna for Hair (ebooks)
God’s Precious Earth